Creating an Expense Report
Business Process Creating an Expense Report
Creating an expense report is completed by the traveler’s assigned proxy. An expense report goes through approval processes based on the travelers HR Supervisor, Reviewer for non-travel related expenses and department manager. After the expense report is approved an EFT or system check is generated.
Creating Expense Report:
Travel Expense Center, Create Expense Report

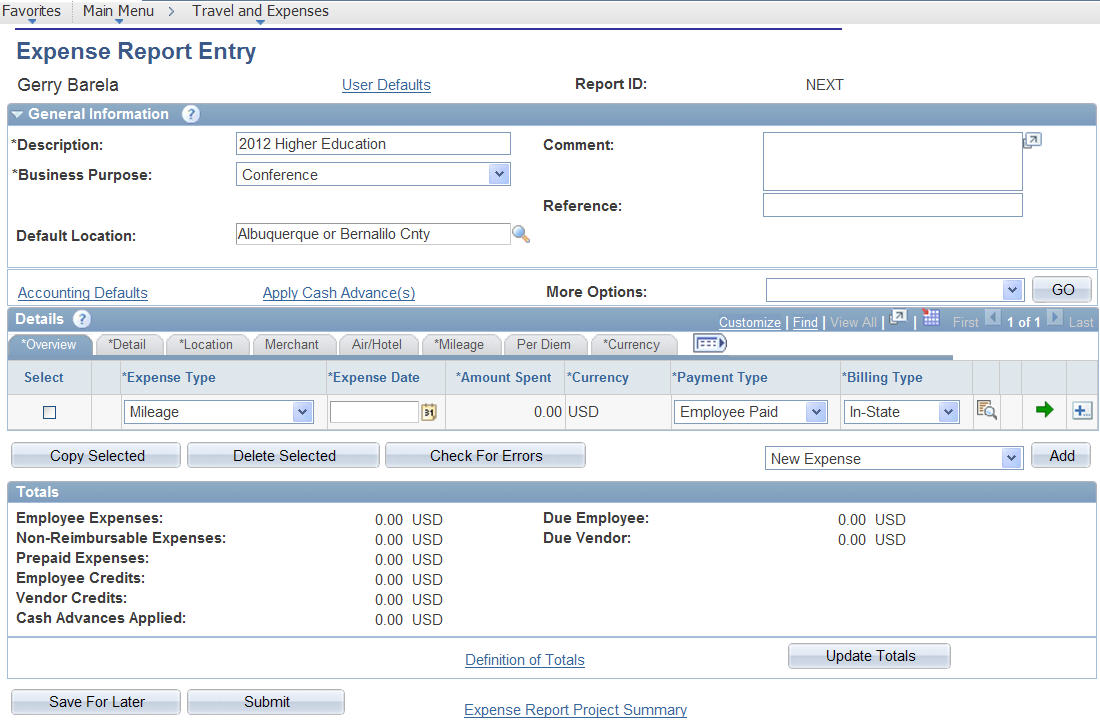
Figure: Expense Report Entry
Quick Start: Select from the drop down menu. A Blank Expense Report is defaulted.
Description: A description of the expense report. This field is 32 characters in length.
Comment: Additional information about the expense report.
Default Location: The locations where the expense were generally incurred.
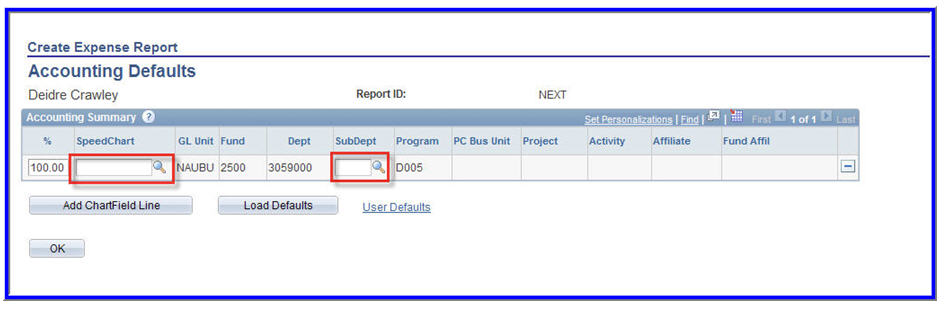
Accounting Defaults: This is the where the Traveler’s charges will be expensed. A pop-up menu will appear. (Entire Expense Report will be charged by how accounting is entered.
You may:
- Accept the default accounting (These are the traveler’s auto-filled dept chartfields)
- Change the accounting by selecting the SpeedChart number from the magnifying glass
- Select the Sub Dept. if applicable
- Split the accounting adjusting % (See example below)
- Click “OK” to return back to expense Report and apply accounting

Apply Cash Advance(s): Applies cash advance(s) to the expense report.
More Options: A drop down menu of associated documents to the expense report.
Details Overview Tab:

Figure: Details Overview Tab
Expense Type: A drop down menu of travel and non-travel expense types.
Expense Date: Date the last day of the trip.
Amount Spent: The actual amount of out of pocket expense. This field is grayed out when the expense type of Mileage is selected.
Currency: This field is defaulted. Not necessary to change.
Payment Type: This field is defaulted. Not necessary to change.
Billing Type: A drop down menu of travel and non-travel billing types.
 Accounting Detail Button: The Accounting Defaults changes the accounting details for the entire document. The Accounting Detail is used when a chartfield line must be changed.

![]() View Additional Fields: The button to access the next field that is applicable for the expense type.
View Additional Fields: The button to access the next field that is applicable for the expense type.
![]() Add Multiple Rows Button: The add button can insert one or more blank lines to the Details grid.
Add Multiple Rows Button: The add button can insert one or more blank lines to the Details grid.
Details – Details Tab:

Figure: Details Tab
Description: Address where the transaction occurred. If non-travel related expense describe merchandise purchased.
Details Location Tab:

Figure: Location Tab
Location: Location where traveler incurred the expense. If a Default Location was selected in the General Information group box or if you enter a previous line with a location this field will populate.
Originating Location: The location from where the traveler began their business travel.
Details Air/Hotel Tab:

Figure: Air/Hotel Tab
Ticket Number: Enter the unique airline ticket number.
Number of Nights: Enter the number of nights that the expense covers.
Details Mileage Tab:

Miles: Total miles traveler drove.
Rate: Displays the rate that it uses to calculate the reimbursement for the distance traveled.
Details Per Diem Tab:

Figure: Per Diem Tab
Start and End Time: Start and end times for the day.
Amount Spent: Displays the calculated M & IE based on the location and Start and End Time.
Training & Documentation
This section provides “How-To” guides for both Travel and Expense reporting. Creating Travel Authorizations, Cash Advances, Travel and Non-Travel expense processing as well as the Approval Processes are but a few from which you may choose. For more detail information on travel compliance, see Travel Processing Tips.
