ITS Site Search
Technical Help

Windows 10
Learn and Utilize Windows 10 within the NAU Environment
![]()
Windows 10 is the latest major release of the Microsoft Windows operating system. Windows 10 is familiar and easy to use, combining the strengths from both Windows 8 and Windows 7. The Start Menu has returned, Charms have been removed, and a new browser has been introduced from Microsoft called Microsoft Edge. The operating system is designed to adapt its user interface to the type of device being used, and even has a built in “Tablet Mode” feature.
System Requirements Accordion Closed
System Requirements for Windows 10
Hardware
| Processor: | 1 gigahertz (GHz) or faster processor or SoC |
|---|---|
| RAM: | 1 gigabyte (GB) (32-bit) or 2 GB (64-bit) |
| Hard disk space: | 16 GB (32-bit) or 20 GB (64-bit) |
| Graphics: | Microsoft DirectX 9 or later with WDDM 1.0 driver |
• Wireless Networks
Wireless – NAU Accordion Closed
Connecting to NAU Wireless with Windows 10
Step 1
From your desktop, click on the Wi-Fi icon (usually located in the bottom-right hand corner).

Step 2
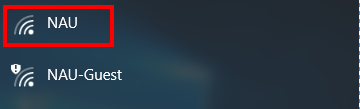
A list of networks will appear above the icon. Select the wireless network labeled “NAU”.
Step 3
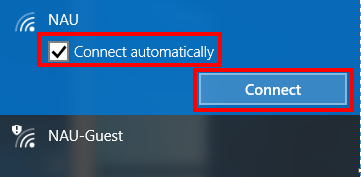
To have your computer automatically connect to the NAU network when it is available check the “Connect automatically” check box. Then, click the “Connect” button.
Step 4
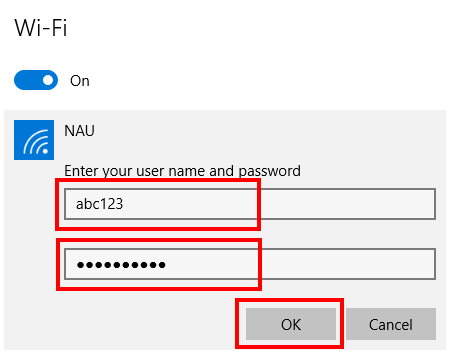
The Network & Internet menu will open. In the “User name” field insert your NAU UserID and in the “Password” field insert your NAU Password. Then, click “OK”.
Step 5
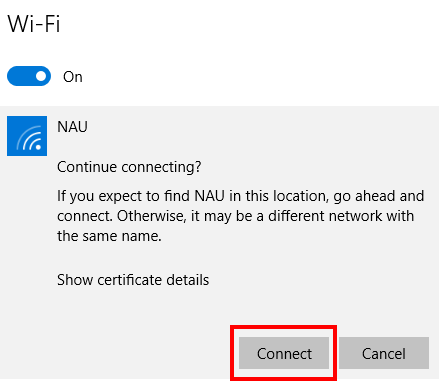
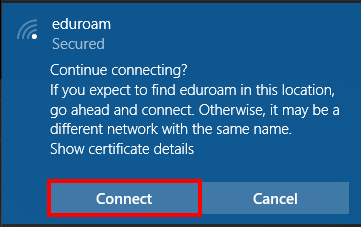
When asked to continue connecting, proceed by clicking the “Connect” button.
Wireless – NAU-Guest Accordion Closed
Connecting to NAU-Guest Wireless with Windows 10
Step 1
From your desktop, click on the Wi-Fi icon (usually located in the bottom-right hand corner).
Step 2
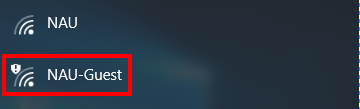
A list of networks will appear above the icon. Select the wireless network labeled “NAU-Guest”.
Step 3
To have your computer automatically connect to the NAU-Guest network when it is available check the Connect automatically check box. Then, click the “Connect” button.

Step 4
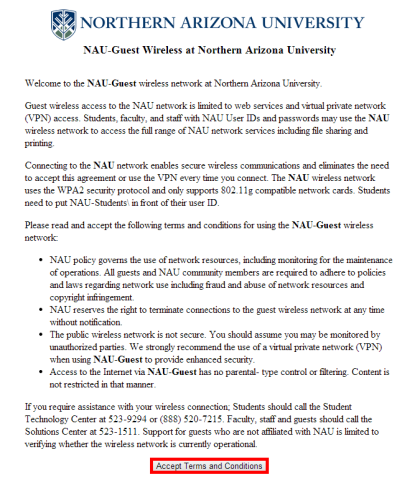
Open a web browser. A splash page will display regarding information about the NAU-Guest network. Please, read through the terms and conditions. Then, click the “Accept Terms and Conditions” button at the bottom of the page.
Eduroam Accordion Closed
Step 1
From your desktop, click on the Wi-Fi icon (usually located in the bottom-right hand corner).
Step 2
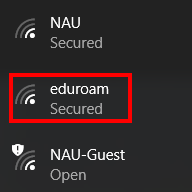
A list of networks will appear above the icon. Select the wireless network labeled “eduroam”.
Step 3
To have your computer automatically connect to the NAU network when it is available check the “Connect automatically” check box. Then, click the “Connect” button.

Step 4
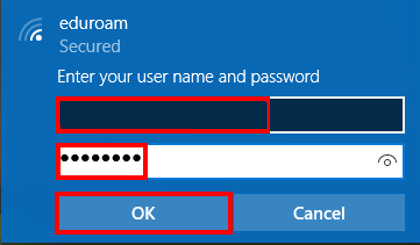
- For Students and Student Employees without an Exchange account, login using your NAU school email in the format of “abc123@nau.edu” in the Username field. In the Password field, insert your NAU Password.
- For Student Employees with an Exchange account, login using your Student Employee email in the format of “abc123@iris.nau.edu” in the Username field. In the Password field, insert your NAU Password.
- For Employees (Faculty, Staff, Affiliate, and etc), login using your primary work email usually in the format of “first.last@nau.edu” in the Username field. In the Password field, insert your NAU Password.
Step 5
When asked to continue connecting, proceed by clicking the “Connect” button.
Update NAU Wireless Password Accordion Closed
Updating the NAU Wireless Password with Windows 10
Open the Start Menu (usually located in the bottom-left hand corner).

Step 2
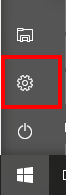
Click on Settings Gear Wheel Icon from within the Start Menu.
Step 3
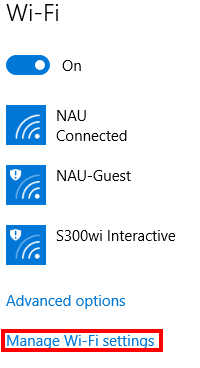
From the settings menu, select “Network & Internet”.

Step 4
Under Wi-Fi, select “Manage Wi-Fi settings”.
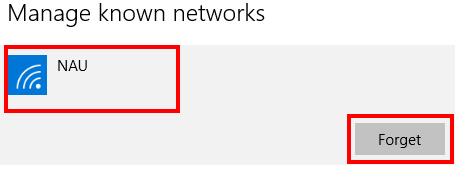
Step 5
Under the Manage known networks section, select the “NAU” wireless network. Then, click the “Forget” button to remove your saved password.
Step 6
From your desktop, click on the Wi-Fi icon (usually located in the bottom-right hand corner).
Step 7
A list of networks will appear above the icon. Select the wireless network labeled “NAU”.
Step 8
To have your computer automatically connect to the NAU network when it is available check the “Connect automatically” check box. Then, click the “Connect” button.
Step 9
The Network & Internet menu will open. In the “User name” field insert your NAU UserID and in the “Password” field insert your new NAU Password. Then, click “OK”.
Step 10
When asked to continue connecting, proceed by clicking the “Connect” button.
• Virtual Private Network (VPN)
Cisco AnyConnect VPN for Windows
• Windows 10 Fundamentals
Network Drive Mapping Accordion Closed
Mapping a Network Drive with Windows 10
Step 1
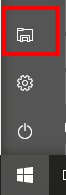
Open the Start Menu (usually located in the bottom-left hand corner).

Step 2
From the menu the appears above the Start Menu, click on the File Explorer File Icon.
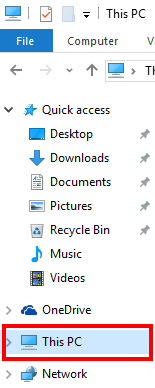
Step 3
From the options in the left hand side, click on “This PC”.
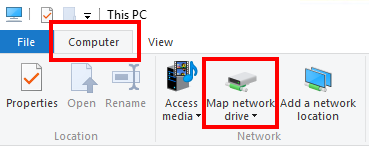
Step 4
In the upper left hand corner of the window click on “Computer”. Then, click on “Map network drive”.
Step 5
In the Drive drop down menu, select an unused drive letter to map the connection to. (In this example we use Drive letter Z:). In the “Folder” field, type “\\servername\sharedfolder” without quotes where “servername” is the name of the server you are connecting to, and “sharedfolder” is the name of the shared folder you are mapping to. (Example: \\naushares\software) If you want this drive to reconnect at sign-in you can check the Reconnect at Sign-in check box. Then, click “Finish”.

Logging Off Accordion Closed
Logging out of a User Profile with Windows 10
Step 1
Open the Start Menu. (Usually located in the bottom-left hand corner of the desktop).

Step 2
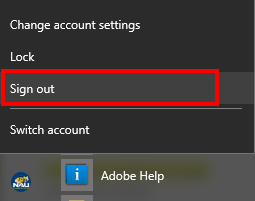
Locate and select your user account icon in the Start Menu.
Step 3
Then, click “Sign out”.
Shutting Down Accordion Closed
Shutting Down with Windows 10
Step 1
Open the Start Menu. (Usually located in the bottom-left hand corner of the desktop).
Step 2
Select Power Icon.
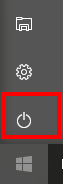
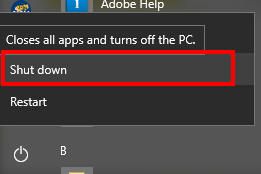
Step 3
Select “Shut Down”.
Searching for Applications Accordion Closed
Searching for Applications with Windows 10
Step 1
Open the Start Menu. (Usually located in the bottom-left hand corner of the desktop).
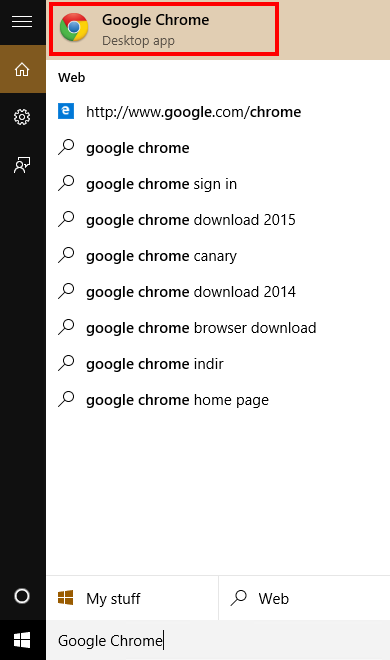
Step 2
To begin searching within the Start Menu, simply start typing the name of the application you are looking for. It is NOT required in Windows 10 to click inside of the search bar first. (In this example we use Google Chrome).
Finding Applications Manually Accordion Closed
Finding Applications Manually with Windows 10
Step 1
Open the Start Menu. (Usually located in the bottom-left hand corner of the desktop).
Step 2
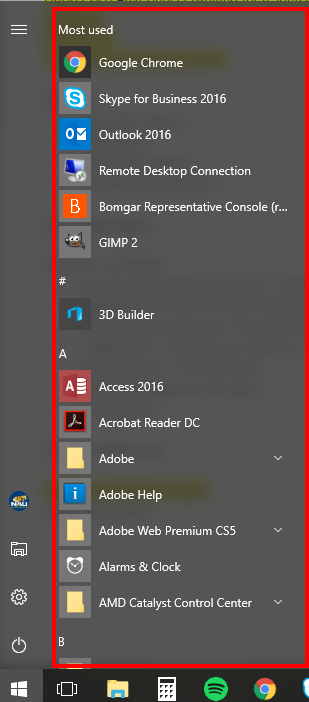
As shown in the image below, a complete list of all the applications will come up in the middle area of the Start Menu. A manual search can be done by scrolling up or down to find the application you are looking for.
Pinning Applications Accordion Closed
Pinning Applications to Useful Locations with Windows 10
Step 1
Open the Start Menu. (Usually located in the bottom-left hand corner of the desktop).
Step 2
To begin searching within the Start Menu, simply start typing the name of the application you are looking for. It is NOT required in Windows 10 to click inside of the search bar first. (In this example we use Google Chrome).
Step 3
Decide where you want to pin the application to: start, taskbar, or a desktop shortcut.
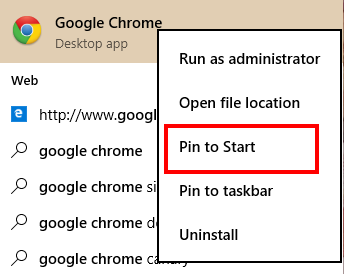
Start:
Right-click the application that you searched for and click “Pin to start”.
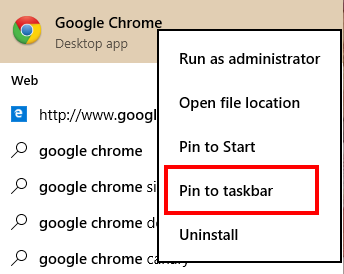
Taskbar:
Right-click the application that you searched for and click “Pin to taskbar”.
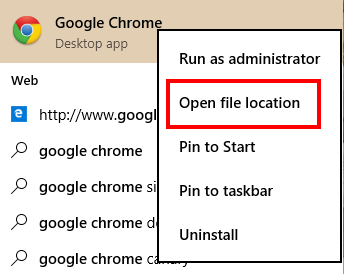
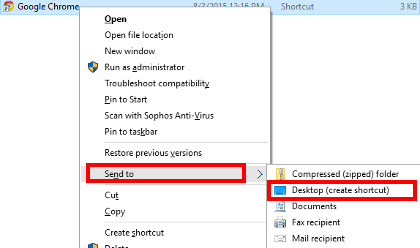
Desktop shortcut:
Right-click the application that you searched for and click “Open file location”.
Step 4 (Desktop shortcut only)
Windows File Explorer will open the location of the application. Right-click the application, and hover over “Send to”. Then, click “Desktop (create shortcut)”.
Data Backup Accordion Closed
First Things First
If there is more than one person who logs on to the computer, EACH person will need to log on and save their data individually.
Step 1
Determine where you will be storing your data. The best place to keep data is on your H: (Bonsai) drive. The server (Bonsai) keeps your data accessible to you at all times and is backed up on a daily basis. If your computer crashes it will NOT affect any data stored on this network drive. Your H: (Bonsai) drive is automatically mapped for you every time you log onto an NAU domain joined computer. If you do not want to back the data up to your H drive, you can back up to a blank CD/DVD, flash drive, or external hard drive.
Step 2
Determine what data you need to back up and save from your local machine. Most files are typically saved in the Documents folder. This folder is typically located at Local Disk (C:) > Users > Your User Name > Documents. If you have files or folders on your Desktop they will be located at Local Disk (C:) > Users > Your User name > Desktop.
Step 3
Copy your data to the determined storage area. The data that has been determined to be backed up and saved from Step 2 will go in the location determined to store data from Step 1.
Refer to the tutorial below for a general walk-through of backing up information to your H: (Bonsai) drive. If you have chosen to back up your data to another location the same steps can be followed by substituting your preferred storage device where the H: (Bonsai) drive is within the instructions.
Backing up Data to the H: (Bonsai) Drive
This tutorial will walk you through coping data to your H: (Bonsai) drive.
Step 1
Open the Start Menu (usually located in the bottom-left hand corner of the desktop).
Step 2
Select File Explorer File Icon.
Step 3
Click on “This PC” from the options inside the File Explorer.
Step 4
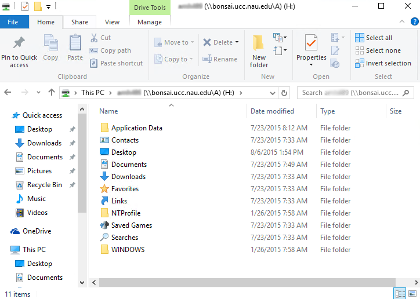
Locate your H: (Bonsai) drive inside the File Explorer. Open the drive by double-clicking it.
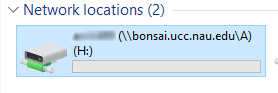
The drive will open in the File Explorer as shown below. Leave this window open and move it to the side so we can come back to it in Step 9.
Step 5
Repeat Steps 1 through 3. Locate your Local Disk. Open the drive by double-clicking it.
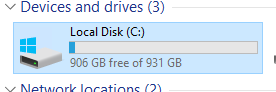
Step 6
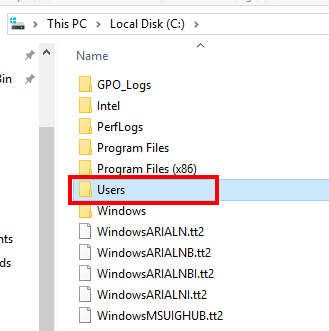
Within your Local Disk, open the “Users” folder by double-clicking it.
Step 7
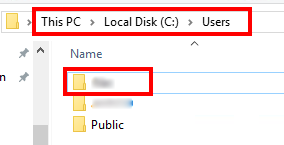
Locate and open the user folder the data you want to back up is located inside of in the Users directory.
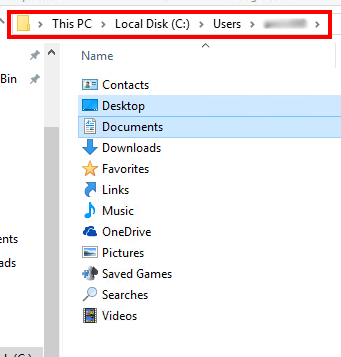
Shown in the image below, the Address bar shows that you are inside of your individual User folder. The Desktop and Documents folders are available inside your User folder. Open the folder (double-click) that the data you want to back up is located inside of.
Step 8
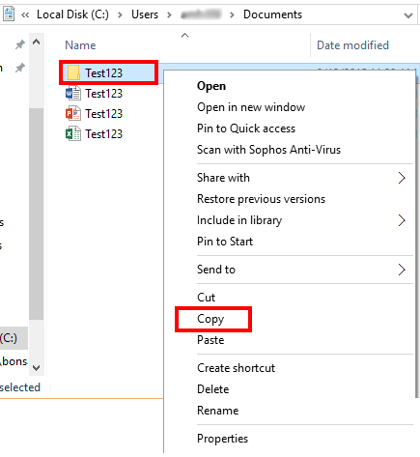
Right-click the file or folder you want to back up to your H: (Bonsai) drive, then click “Copy”. (In this example we are inside of the Documents folder).
Step 9
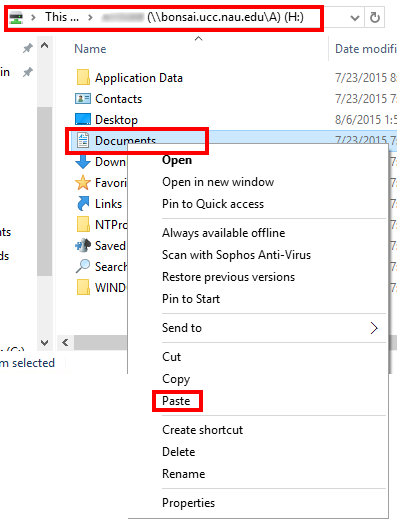
Once you have copied the file or folder you want to back up, reopen the H: (Bonsai) drive window from Step 4. Right-click the location inside your H: (Bonsai) drive you want to copy the file or folder to (in this example we are copying to the Documents folder). Then, click “Paste”.
Locating MAC Address Accordion Closed
Step 1
Click on the Start Menu.
Step 2
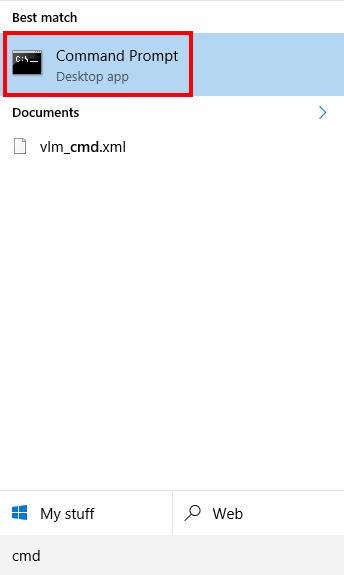
To begin searching, simply start typing “cmd”. It is NOT required in Windows 10 to click inside of the search bar first. Click on the “Command Prompt”.
Step 3
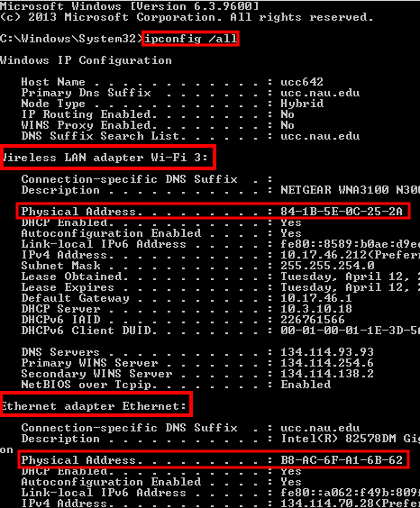
In the Command Prompt window, type the following: “ipconfig /all”. with a space between the ipconfig and forward slash ( / ). Your network information will appear below:
The MAC Address for Wi–Fi will appear below “Wireless LAN adapter”. It is called the “Physical Address”.
The MAC Address for Ethernet will appear below “Ethernet adapter”. It is called the “Physical Address”.
Disabling OS Selection Accordion Closed
Disabling OS Selection on Boot with Windows 10
Step 1
Open the Start Menu. (Usually located in the bottom-left hand corner of the desktop.)

Step 2
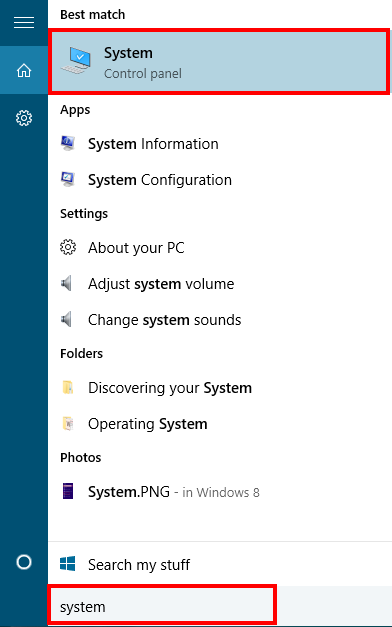
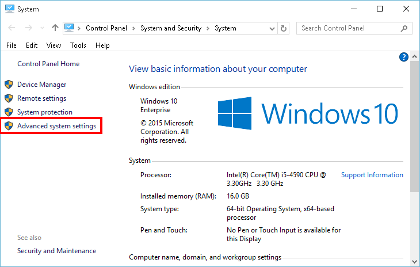
Search for “System”. To begin searching within the Start Menu, simply just start typing “system” (it is NOT necessary to click inside a search bar). When the System application appears, click to open it.
Step 3
The System window will open. Select “Advanced system settings” from the options on the left.
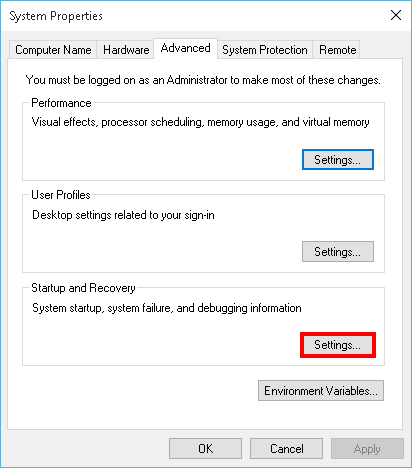
Step 4
The Advanced System Properties window will open. Under “Startup and Recovery”, click the “Settings…” button.
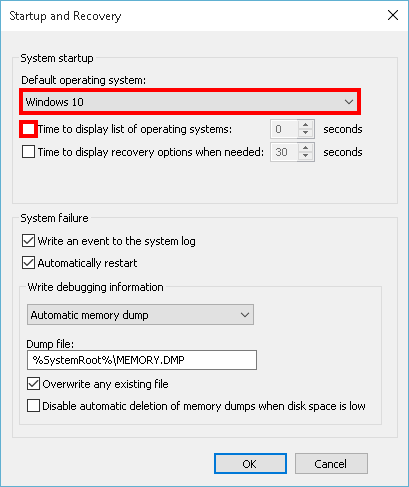
Step 5
The Startup and Recovery window will open. Ensure that “Windows 10” is the default operating system. Un-check the “Time to display list of operating systems” check box. Then, click “OK”.
Keyboard Shortcuts Accordion Closed
Keyboard Shortcuts with Windows 10
| To Do This | Press This |
|---|---|
| Search your PC | Windows Key then, Start typing |
| Snap Window Left/Right on the screen | Windows Key + Left/Right Arrow |
| Snap Window Up/Down on the screen | Windows Key + Up/Down Arrow |
| Open Task View | Windows Key + Tab |
| Creates new virtual desktop and switches to it | Windows Key + Ctrl + D |
| Close the current virtual desktop | Windows Key + Ctrl + F4 |
| Switch between virtual desktops | Windows Key + Ctrl + Left/Right Arrow |
| Close the active item, or exit the active application | Alt + F4 |
| Open Action Center | Windows Key + A |
| Set focus in the notification area | Windows Key + B |
| Display and hide the desktop | Windows Key + D |
| Open Windows File Explorer | Windows Key + E |
| Open the Share charm | Windows Key + H |
| Open Settings | Windows Key + I |
| Open the Connect quick action | Windows Key + K |
| Lock your PC or switch people | Windows Key + L |
| Minimize all windows | Windows Key + M |
| Lock the screen orientation (portrait or landscape) | Windows Key + O |
| Choose a presentation display mode | Windows Key + P |
| Open Search to search the web and Windows (Will search with Cortana if enabled) | Windows Key + S |
| Open a menu of administrative tools. (Ex. Programs and Features, Task Manager, Shut Down). | Windows Key + X |
In the table above, Windows Key is represented by the icon  or
or  on most keyboards.