Contact ITS Support

macOS Big Sur (11)
Learn and Utilize macOS Big Sur (11)
within the NAU Environment

macOS Big Sur is the 17th and current major release of macOS, Apple Inc.’s operating system for Macintosh computers, and is the successor to macOS Catalina
General Requirements Accordion Closed
- OS X 10.9 or later.
- 4GB of memory.
- 35.5GB available storage on macOS Sierra or later*.
- Some features require an Apple ID; terms apply.
- Some features require a compatible Internet service provider; fees may apply.
Mac Hardware Requirements Accordion Closed
For details about your Mac model, click the Apple icon at the top left of your screen and choose About This Mac. These Mac models are compatible with macOS Big Sur:
- MacBook (2015 or later)
- MacBook Air (2013 or later)
- MacBook Pro (Late 2013 or later)
- Mac mini (2014 or later)
- iMac (2014 or later)
- iMac Pro (2017 or later)
- Mac Pro (2013 or later)
• Wireless Networks
Wireless – NAU Accordion Closed
Step 1
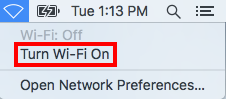
Click the Wi-Fi icon near the right-hand side of the menu bar at the top of the screen. In the menu that appears, click “Turn Wi-Fi On“.

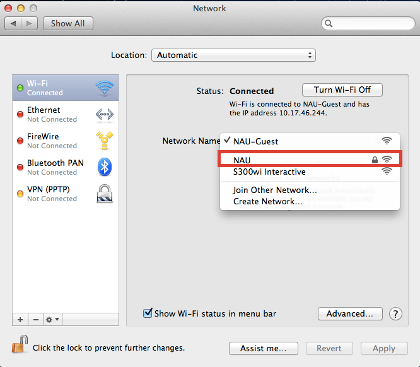
Step 2
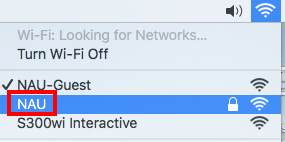
In the same menu, select “NAU“.
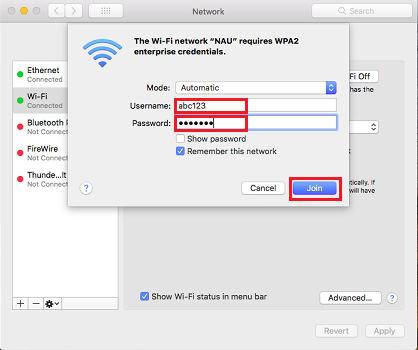
Step 3
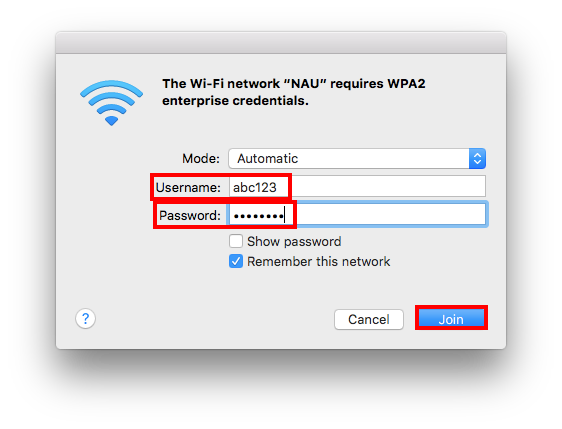
Enter your NAU UserID in the “Username” field and your NAU Password in the “Password” field. Then, click “Join“.
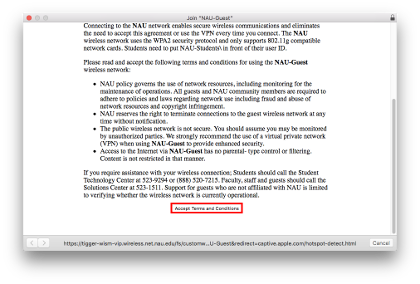
Wireless – NAU-Guest Accordion Closed
Step 1
Click the Wi-Fi icon near the right-hand side of the menu bar at the top of the screen. In the menu that appears, click “Turn Wi-Fi On“.
Step 2
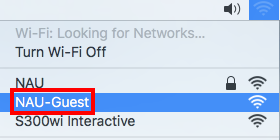
In the same menu, select “NAU-Guest“.
Step 3
A page will appear with information regarding the network. If a page does not automatically display, open a web browser. Please read the “Terms and Conditions” and click the “Accept” button at the bottom of the page.
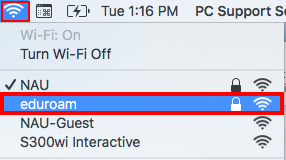
Eduroam Accordion Closed
Step 1
Click the Wi-Fi icon near the right-hand side of the menu bar at the top of the screen. In the menu that appears, select “eduroam”.
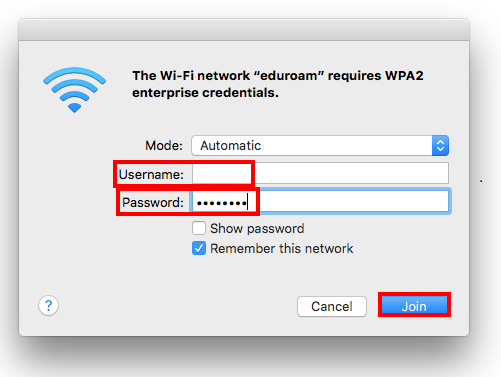
Step 2
- For Students and Student Employees without an Exchange account, login using your NAU school email in the format of “abc123@nau.edu” in the Username field. In the Password field, insert your NAU Password.
- For Student Employees with an Exchange account, login using your Student Employee email in the format of “abc123@iris.nau.edu” in the Username field. In the Password field, insert your NAU Password.
- For Employees (Faculty, Staff, Affiliate, and etc), login using your primary work email usually in the format of “first.last@nau.edu” in the Username field. In the Password field, insert your NAU Password.
Update NAU Wireless Password Accordion Closed
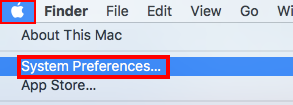
Step 1
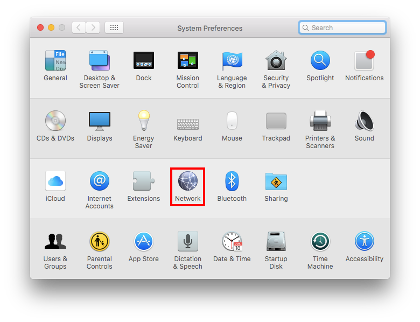
Click the “Apple” icon on the far left-hand side of the menu bar at the top of the screen. Click “System Preferences” in the menu.
Step 2
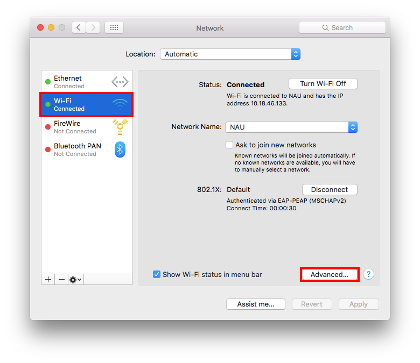
Select “Network”
Step 3
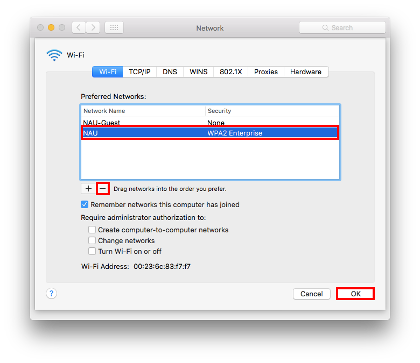
Click the “Wi-Fi” option in the left-hand list, and click “Advanced.”
Step 4
Click “NAU” in the “Preferred Networks” list to select it, and click the minus (“-“) sign below the list. Then, click “OK“.
Step 5
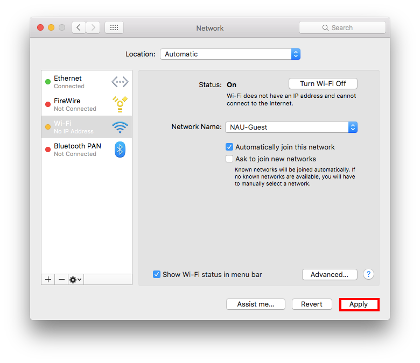
Click “Apply“.
Step 6:
Click the drop-down menu next to “Network Name” and click “NAU” in the menu.
Step 7
Enter your NAU UserID in the “Username” field and your NAU Password in the “Password” field. Then, click “Join“.
• Virtual Private Network (VPN)
Cisco AnyConnect VPN for Mac OS X
• macOS High Catalina (10.15) Fundamentals
Network Drive Mapping Accordion Closed
Step 1
Open the “Finder”

Step 2
Select the “Go” tab in the navigation bar. Select the “Connect to Server…” option at the bottom of the drop down menu. In this case the hotkey command ( ) + K can be used to open the “Connect to Server” window.
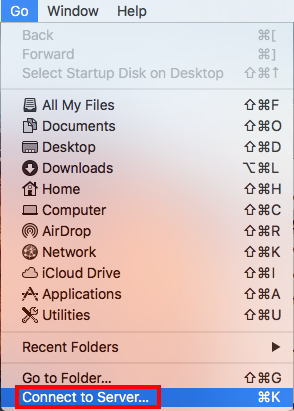
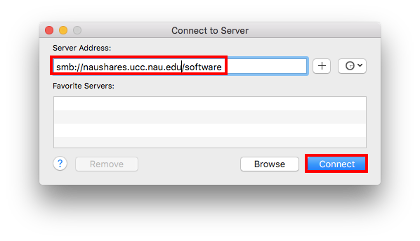
Step 3
In the “Server Address” field, type in your desired server. Select the “Connect” option.
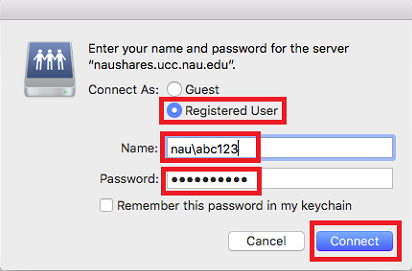
Step 4
Under “Connect as:” select “Registered User”. In the “Name” field, type your NAU username, which is demonstrated by abc123. In the “Password” field, type your NAU password. Select “Connect”, you are now connected to the network.
Logging Out Accordion Closed
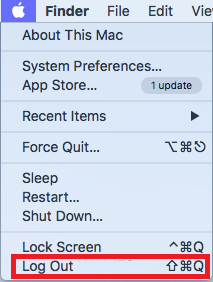
Step 1
Begin by selecting the “Apple” icon on the far left-hand side of the menu bar at the top of the screen. Then, select the “Log Out” option to successfully logout.
Require Password After Sleep or Screen Saver Accordion Closed
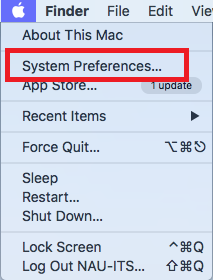
Step 1
Begin by selecting the “Apple” icon on the far left-hand side of the menu bar at the top of the screen. Then, select the “System Preferences…” option.
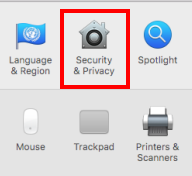
Step 2
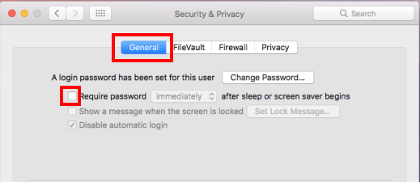
Next, select the “Security & Privacy” Icon.
Step 3
Ensure you are in the “General” tab. Then, select the checkbox next to “Require password after sleep or screen saver beings” to enable a prompt for password after sleep or screen saver.
Step 4
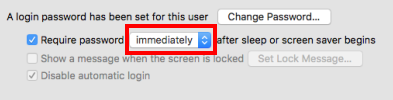
After completion of Step 3, there should be a check mark within the box as seen in the picture below. Next, set the time limit for how long after the sleep or screen saver begins to require a password by selecting the “Blue Arrows” which are highlighted. For this example, we selected “immediately” from the drop down menu.
Data Backup Accordion Closed
Step 1
Open “Finder.”

Step 2
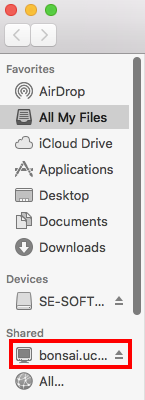
In the Finder window, open the Bonsai Drive. For help mapping to your Bonsai drive, refer to our Bonsai support page.
Step 3
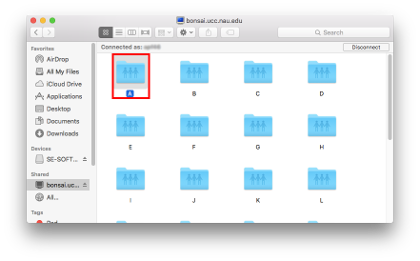
After “Connected As:” check to make sure that it is you that is connected. If not, disconnect, then reconnect using your NAU User ID.
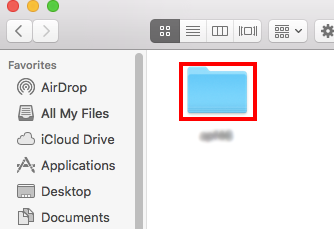
In the Bonsai Drive, locate and select the folder containing the first letter of your NAU User ID. (In this example, we select folder “A” because we are using “abc123” as the NAU User ID.)
Step 4
Select the folder labeled with your NAU User ID. It should be the only folder within this window.
The window will open the contents of your Bonsai drive. *Leave this window open, and move it to the side until Step 8.
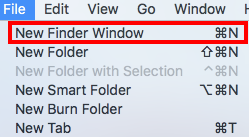
Step 5
On the navigation bar, select the “File” tab. In the drop down menu, select “New Finder Window”.
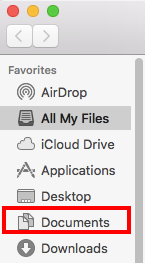
Step 6
Open the “Documents” folder.
*Documents is being used as an example. Replace it with your desired location.
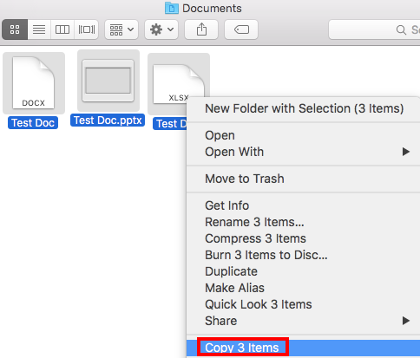
Step 7
In the Documents window, command () + click to select the items you want to back up. Ctrl + click or right-click on the items. In the drop down menu that appears, select “Copy”.
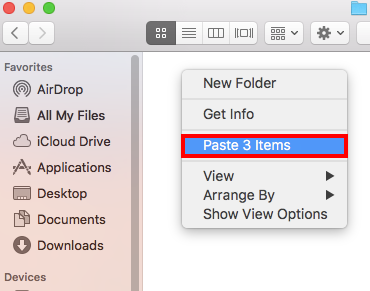
Step 8
Return to the Bonsai Drive window from Step 4. Ctrl + click or right-click the white space inside the window. In the drop down menu that appears, select “Paste”.
Locating MAC Address Accordion Closed
Step 1
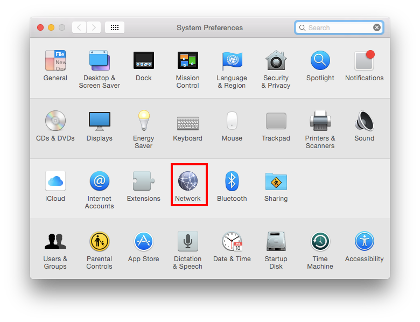
Click on the Apple Icon in the upper left of the screen. Select the “System Preferences” option.
Step 2
In the System Preferences menu, select “Network”.
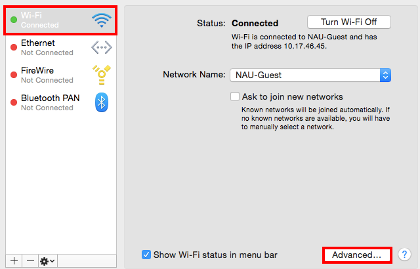
Step 3
On the Wi–Fi menu, select “Advanced…”.
*Note: In this tutorial, we find the MAC Address for your wireless adapter. You can choose to find the “Ethernet” MAC Address following the same steps.
Step 4
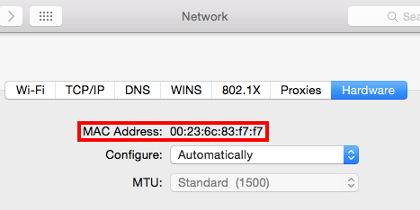
Select “Hardware”.

Step 5
The MAC Address is the string of numbers located after “Mac Address:”.
Directory Services (LDAP) Accordion Closed
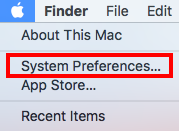
Step 1
Select the Apple symbol from the navigation bar.

Step 2
Select “System Preferences…” from the drop down menu.
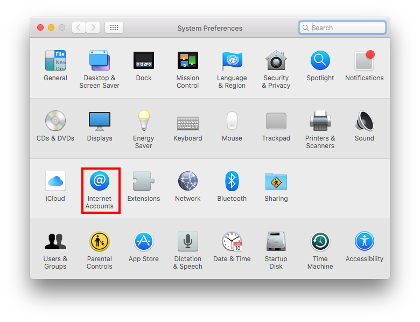
Step 3
In System Preferences, select “Internet Accounts”.
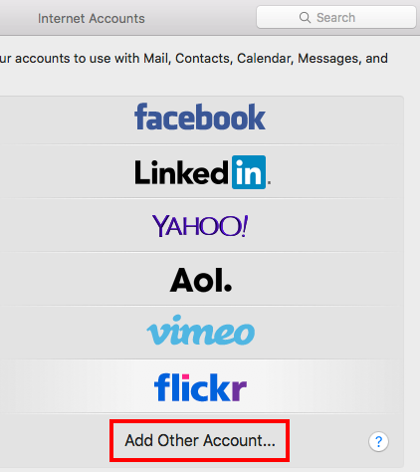
Step 4
Scroll down, select “Add Other Account…”.
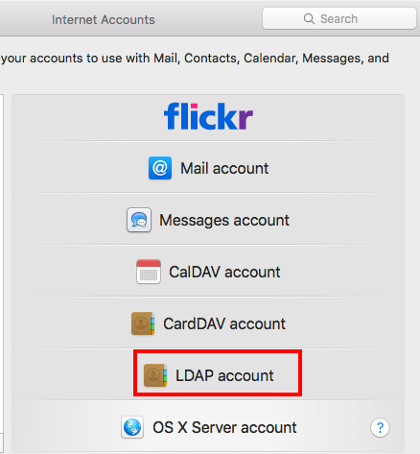
Step 5
Select “LDAP account”.
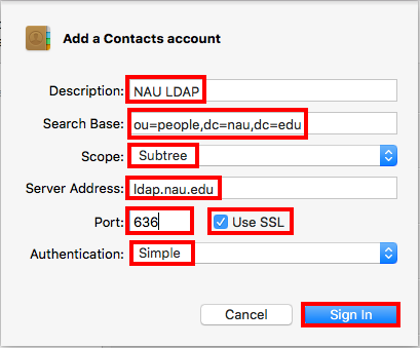
Step 6
- Type “NAU LDAP” into the “Descriptions” field.
- Type “ou=people,dc=nau,dc=edu” into the “Search base” field.
- In the “Scope” field, make sure the selection is “Subtree”.
- Type “ldap.nau.edu” into the “Server Address” field.
- Type “636” into the “Port” field.
- Make sure to check the “Use SSL” check box.
- Select “Simple” for the “Authentication” option.
• macOS Big Sur (11) Fundamentals