ITS Site Search
Technical Help

OWA 2016: Calendar
Working with the Calendar in OWA 2016
• Managing Calendar Events
Creating Calendar Events Accordion Closed
Step 1
To begin, click on the “Menu” button on the upper left-hand side of the Outlook Web App. Then, click on the large blue box in the drop down labeled “Calendar“.

Step 2
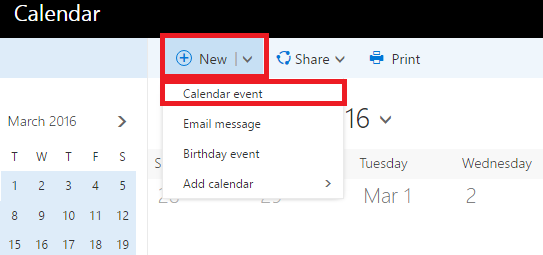
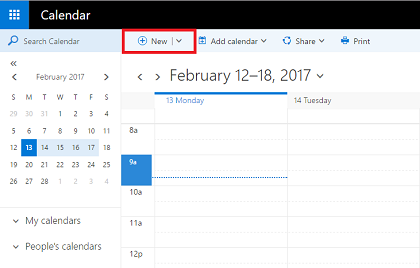
Click on the button on the top of the Calendar view labeled “New” with what looks like a “Plus” sign in a circle next to it. Then, click on the button labeled “Calendar event” in the drop down menu.
Step 3
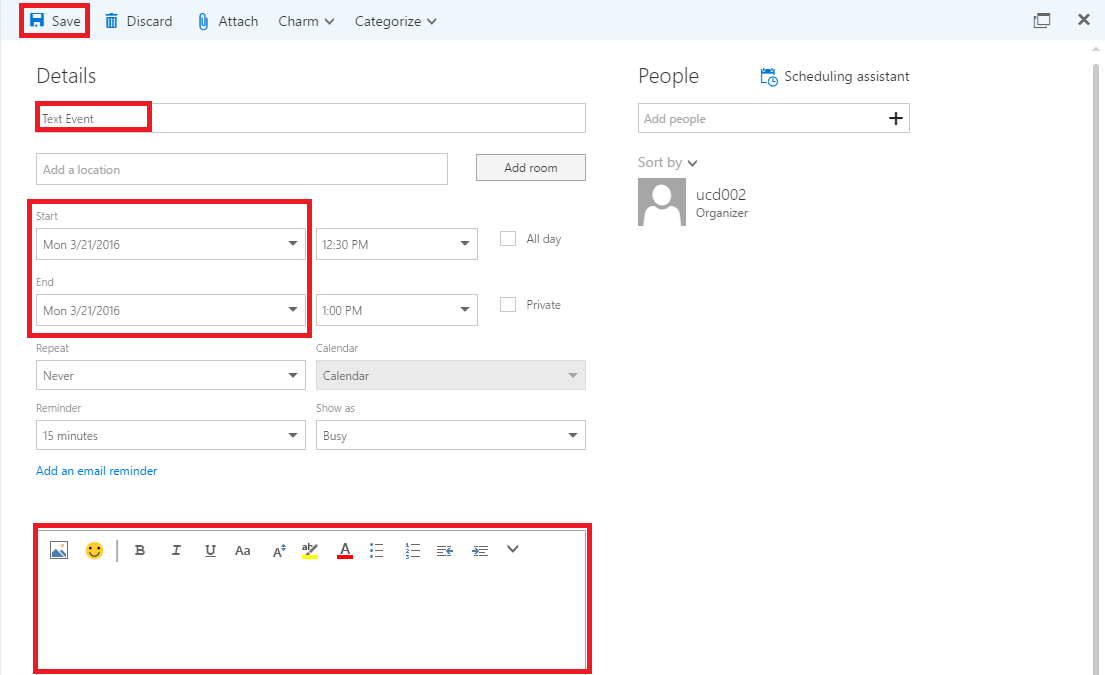
A large menu will open that has all of the options you need for creating a meeting. You can create the name of the event, set a start date and end date, and add notes and reminders for the meeting all in your calendar. When you are done, click on “Save” to save the meeting to your calendar.
Step 4
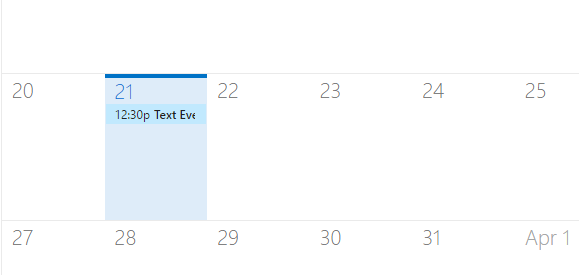
When your event is saved, it automatically appears in your calendar under the date the event is listed.
Inviting People to Events – New Event Accordion Closed
Step 1
To begin, click on the “Menu” button on the upper left-hand side of the Outlook Web App. Then, click on the large blue box in the drop down labeled “Calendar“.
Step 2
Click on the button on the top of the Calendar view labeled “New“. Then, click on the button labeled “Calendar event” in the drop down menu.
Step 3
A large menu will open that has all of the options you need for creating a meeting. You can create the name of the event, set a start date and an end date, and add notes and reminders for the meeting all in your calendar. When you are done, click on “Save” to save the meeting to your calendar.
Step 4
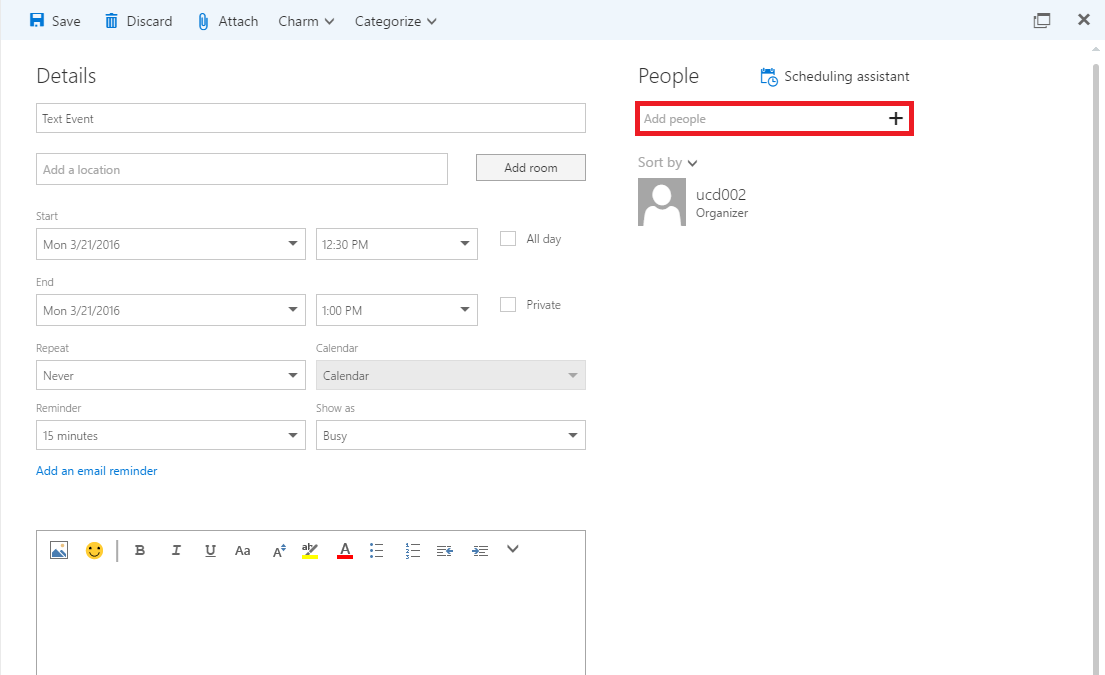
You will be brought to the event editor where you can make changes to the meeting. To add people, click on the “Plus” in the box labeled “Add People” on the right side of the editor.
Step 5
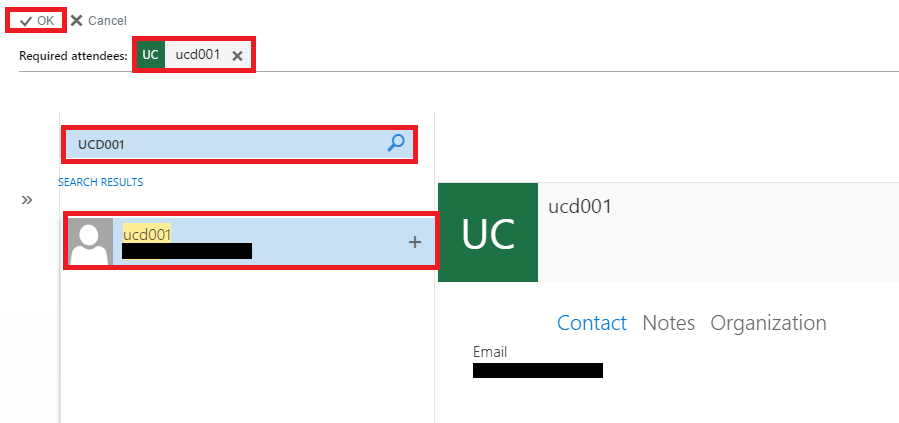
In the search box, type in the name of the person you wish to add to the meeting. Then, click their name. Their name will then appear next to the “Required attendees” message at the top. You can search and add as many people as you need and each will appear in this area. Once you are finished, select “OK” with the check-mark on the upper left-hand side of the box.
Step 6
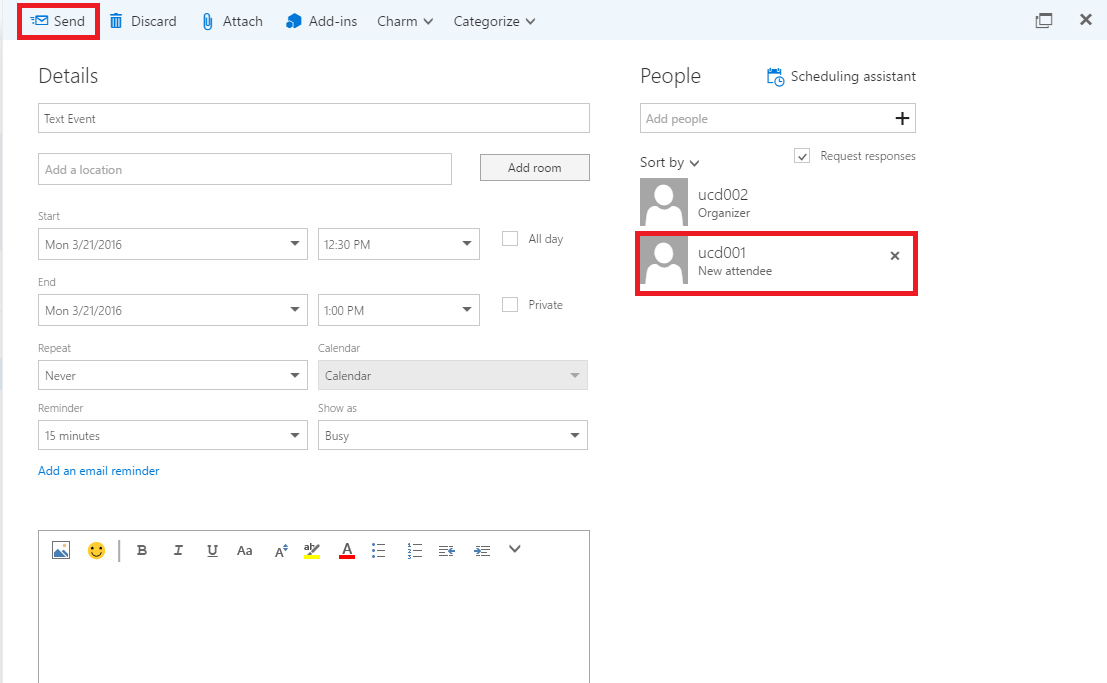
You will be taken back to the editor where you can now see on the right hand side the people you have added to the meeting. To finish, click on the “Send” button on the upper left-hand side of the screen. This will send the meeting to the people you have invited and save the meeting.
Step 7
When your event is saved, it automatically appears in your calendar under the date the event is listed.
Inviting People to Events – Existing Event Accordion Closed
Step 1
To begin, click on the “Menu” button on the upper left-hand side of the Outlook Web App. Then, click on the large blue box in the drop down labeled “Calendar“.

Step 2
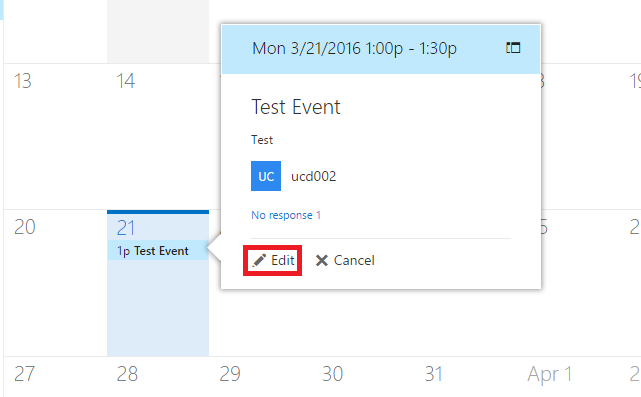
In your calendar, find the event that you want to add participants to and click on the event. Then, click on the button labeled “Edit” in the pop-up box.
Step 3
You will be brought to the event editor where you can make many changes. To add people, click on the “Plus” in the box labeled “Add People” on the right side of the editor.

Step 4
In the search box, type in the name of the person you wish to add to the meeting. Then, click their name. Their name will then appear next to the “Required attendees” message at the top. You can search and add as many people as you need and each will appear in this area. Once you are finished, click “OK” with the check-mark on the upper left-hand side of the box.
Step 5
You will be taken back to the editor where you can now see on the right hand side the people you have added to the meeting. To finish, click on the “Send” button on the upper left-hand side of the screen. This will send the meeting to the people you have invited and save the meeting.

Recurring Events Accordion Closed
Step 1
To begin, click the “Menu” button on the upper left-hand side of the Outlook Web App. Then, click on the large blue box in the drop down labeled “Calendar“.

Step 2
Find the event you wish to turn into a recurring event in your calendar. Then, click on the event. Next, click on the button labeled “Edit” in the box that opens up from the event.

Step 3
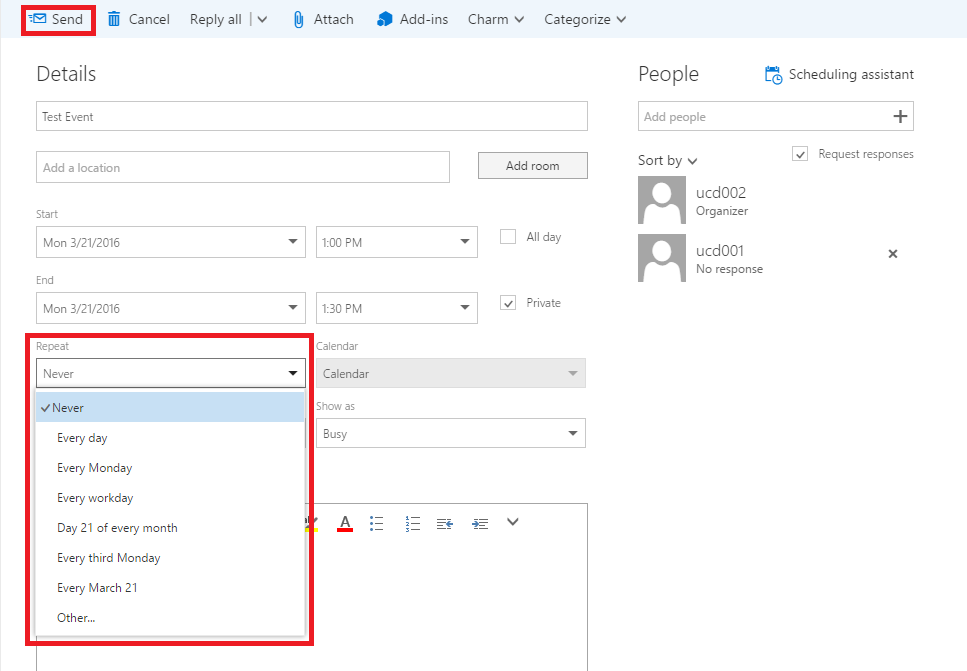
You will then be taken to the event editor for your event. To make your event a recurring event, click on the drop down menu button under the word “Repeat“. Then, select the option that you would like for your event. Finally, click the “Send” button on the upper left-hand side of the editor.
Step 4
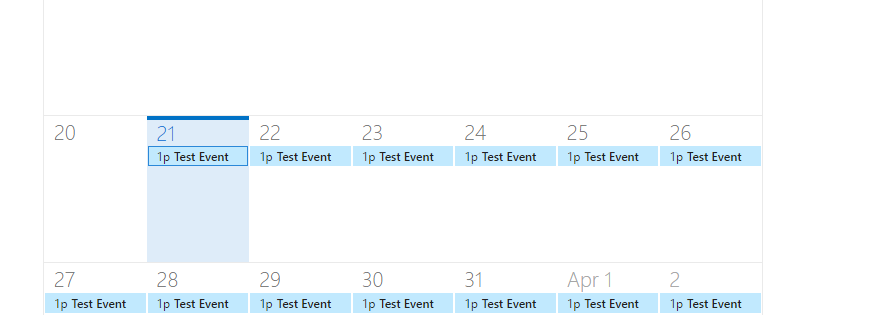
When you are finished, your event will automatically be added in a recurrence according to your specifications, for instance every day.
Private Events Accordion Closed
Step 1
To begin, click on the “Menu” button on the upper left-hand side of the Outlook Web App. Then, click on the large blue box in the drop down labeled “Calendar“.

Step 2
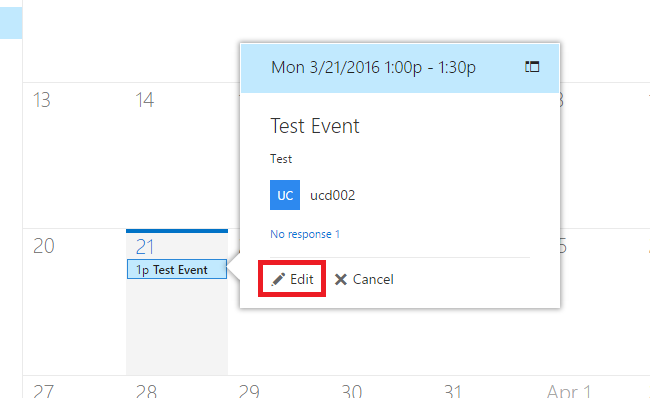
Find the event you wish to set to private in your calendar and click on the event. Then, click on the button labeled “Edit” in the pop-up box that appear.
Step 3
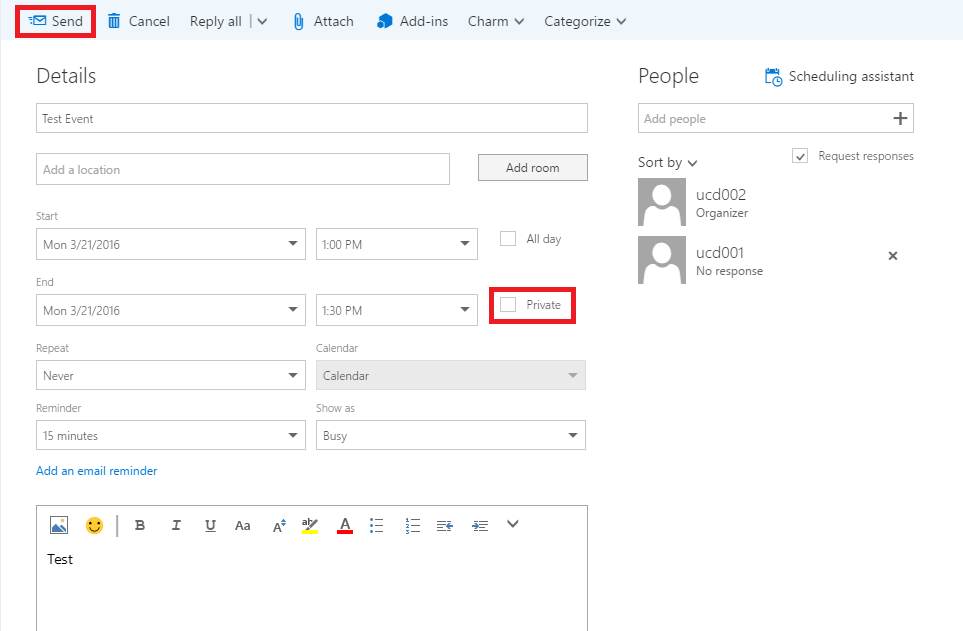
The event editor for the event you chose will open. To set the event to private, check the box next the “Private” in the middle of the editor. Then, click the “Send” button.
Deleting Calendar Events Accordion Closed
Step 1
To begin, click on the “Menu” button on the upper left-hand side of the Outlook Web App. Then, click on the large blue box in the drop down labeled “Calendar“.

Step 2
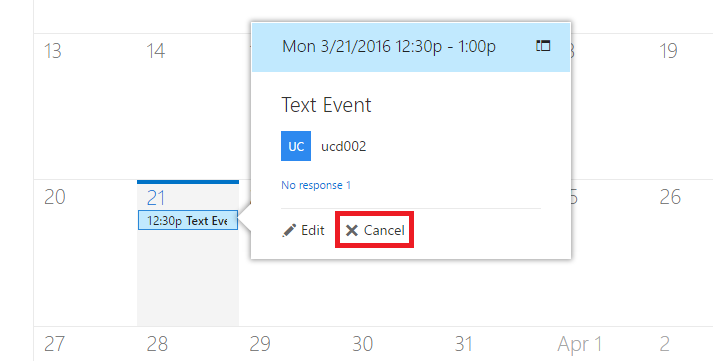
Find the event that you wish to delete in your calendar and click on the event. Then, click on the “Cancel” button in the pop-up window.
(Note: If it is a recurring event, whether you edit or press cancel, you will get the option to affect the entire series of events or specifically the one you are currently on.)
Step 3
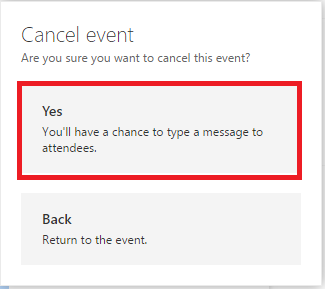
To cancel the event, click on “Yes“.
Step 4
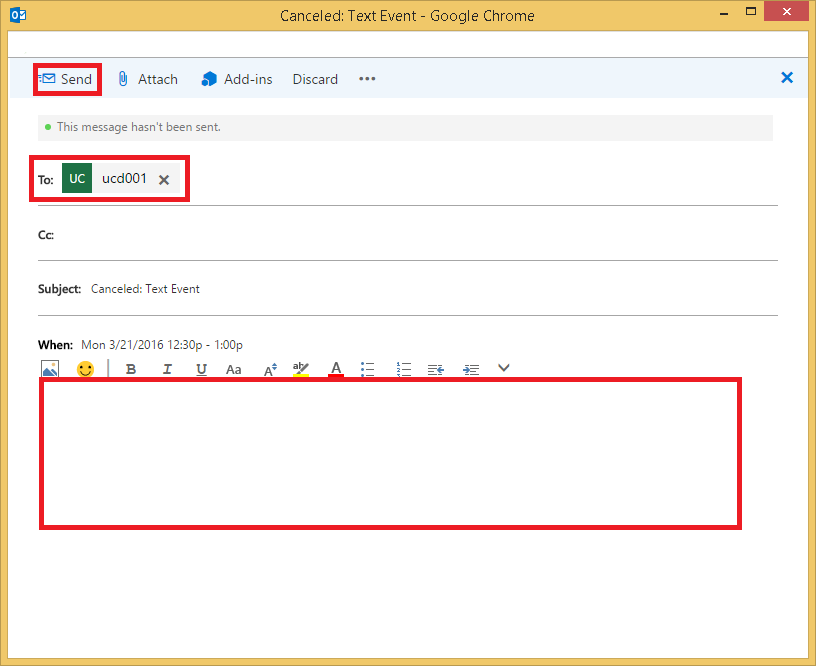
Once you have clicked the “Yes” button, you will be taken to a screen where you have the option to type a message to the events invitees and explain why it is being canceled. Each member in the event will be in the “To:” box.
When you are finished, click the “Send” button on the top left-hand side of the window to cancel the event and send the message of the event being canceled.
Creating a Skype for Business Online Meeting Accordion Closed
For help with Skype for Business, Lync 2011, or Online Meetings and Conference Calling, please refer to our Skype for Business documentation, Lync 2011 documentation, and our Quick Start Guide to Conference Calling and Online Meetings documentation.
Step 1
To begin, click on the “Menu” button on the upper left-hand side of the Outlook Web App. Then, click on the large blue box in the drop down labeled “Calendar“.
Step 2
Select “New” on the upper menu bar.
Step 3
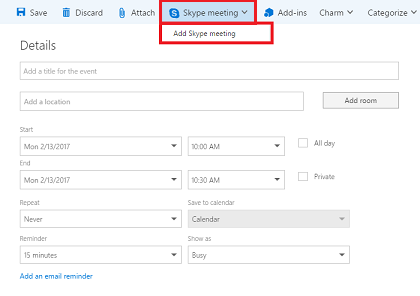
The new meeting windows will appear. To add the Skype for Business meeting, select the drop down menu “Skype Meeting”. Then, select “Add Skype Meeting”.
Step 4
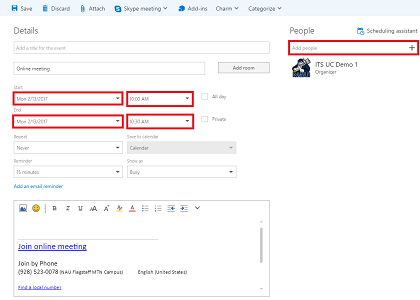
The Skype meeting will have attached itself to the email. From here you can add your preferred settings to the meeting and invite attendees.
Step 5
If you would like to view the Skype meeting settings, re-select “Skype meeting” and select “Skype meeting settings”.

Step 6
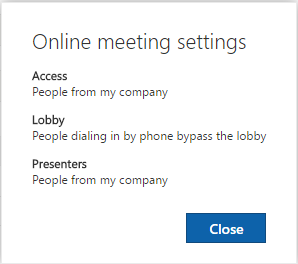
These are the Online meeting settings. Unfortunately, you cannot change these settings from OWA. You have to open the meeting through either Skype for Business or Lync 2011.
Step 7
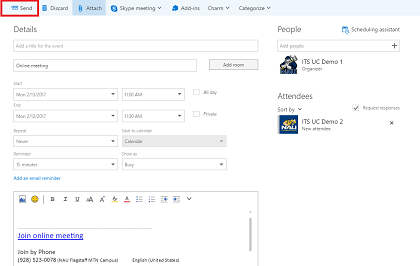
After you have added your information, select “Send”.
• Working with Shared Calendars
Accepting Access to Shared Calendars Accordion Closed
Step 1
To begin, click on the “Menu” button on the upper left-hand side of the Outlook Web App. Then, click on the large blue box in the drop down labeled “Calendar“.

Step 2
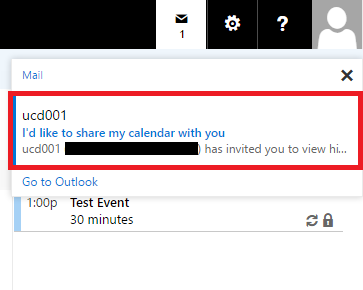
When you first get an invite for a shared calendar, you will get a notification on the upper right-hand side of the Outlook Web App. Click on the notification box and then click on the notification itself.
Step 3
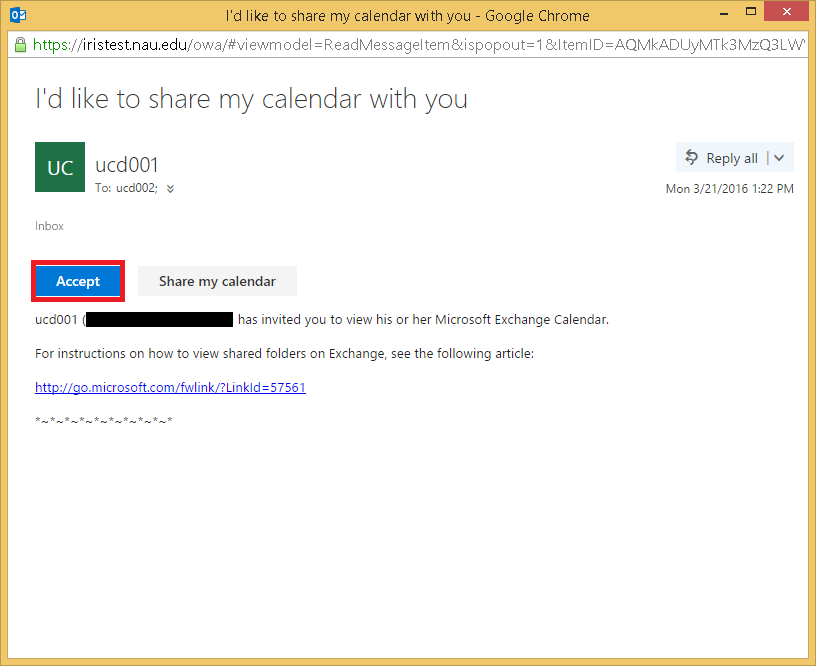
Next, a new browser window will open up, which allows you to accept the invitation for the shared calendar. Click the “Accept” button and the window will automatically close.
(Note: there is also a link to Microsoft’s main site that helps with viewing shared folders on Microsoft Exchange).
Accessing Shared Calendars Accordion Closed
Step 1
To begin, click on the “Menu” button on the upper left-hand side of the Outlook Web App. Then, click on the large blue box in the drop down labeled “Calendar“.
Step 2
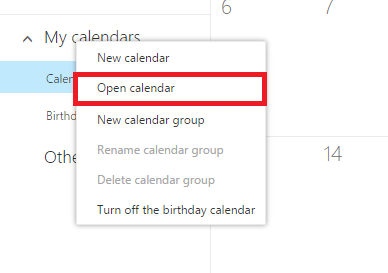
Once you are back at your main calendar screen, move over to the section of the page labeled “My Calendars“. Then, right-click on “Calendars” and click on “Open calendar” in the pop-up menu.
Step 3
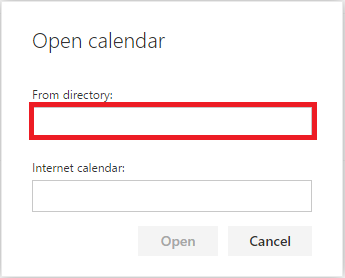
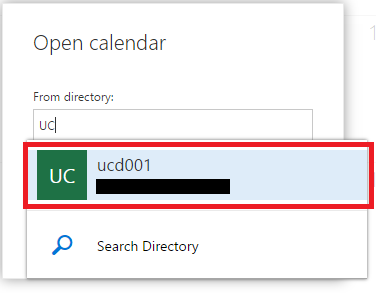
A window will appear. Type the name of the person who you accepted the shared calendar from.
Step 4
The user should automatically pop up once you begin typing. Click on the user, or finish typing the user’s full name. Then, click on the user when you are finished typing.
Step 5
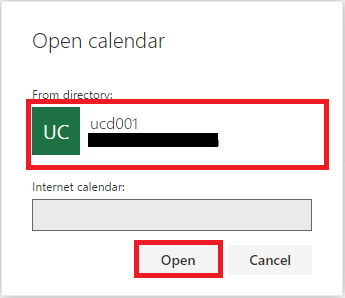
The user’s name will then automatically be on the menu as the person you need. Click on the “Open” button to finished adding that user’s particular calendar.
Step 6
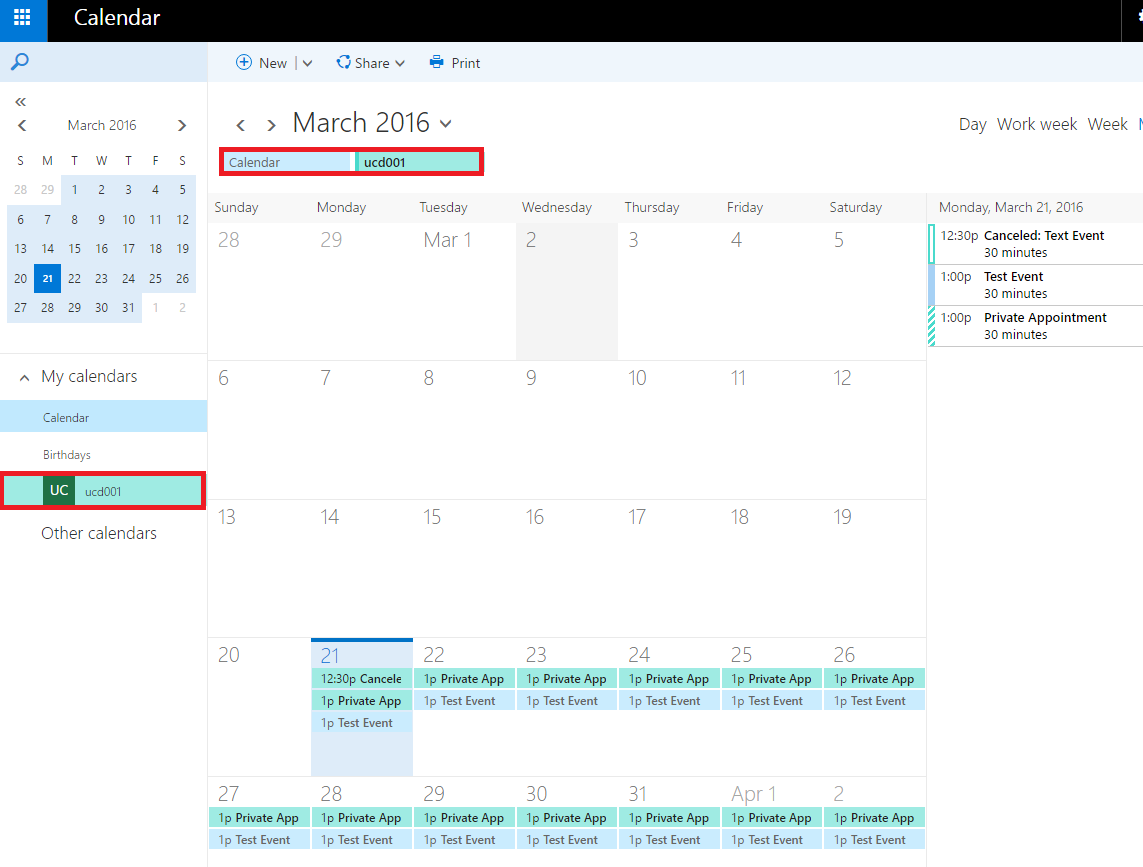
Under the “My Calendars” section, you will now see the user’s Calendar, which you have added under your own.

Step 7
By clicking on the shared calendar of the user you added, you can toggle their calendar on and off by clicking it on and off on your own.
Granting Access to Calendar Accordion Closed
Step 1
To begin, click on the “Menu” button on the upper left-hand side of the Outlook Web App. Then, click on the large blue box in the drop down labeled “Calendar“.

Step 2
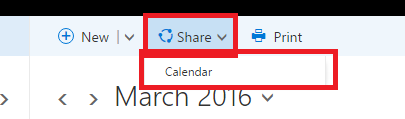
Click on the “Share” button located at the top of your calendar view. Then, click on the “Calendar” button in the drop down list.
Step 3
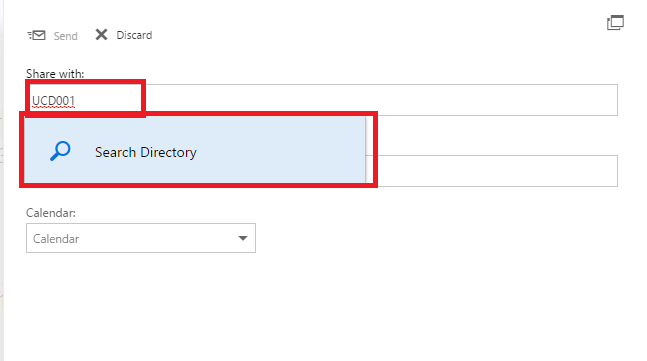
Search for the name of the person or user that you wish to share your calendar with. Then, click on their name.
Step 4
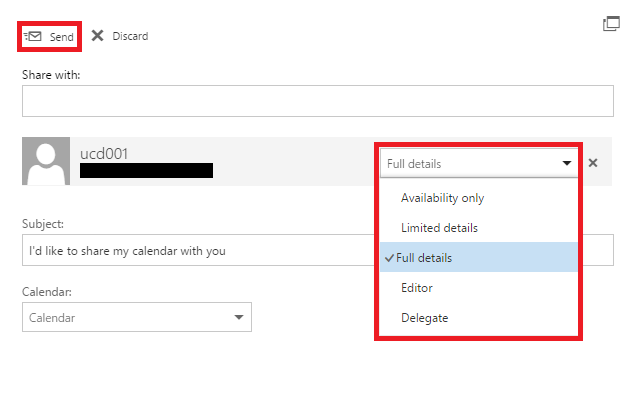
In the user’s box, you can choose what aspects of your calendar you wish to share with that user, including as a delegate. For example, sharing the full details of your calendar with the user. When you are finished, click the “Send” button on the upper left-hand side to send the shared calendar invitation to the user.
Details in Sharing your Calendar
Availability only: Shows the time of items on your calendar and no other details
Limited details: Shows the time, subject, and location, but no other information.
Full details: Shows the time, subject, location, and other details of all items in your calendar.
Editor: Can edit your calendar.
Delegate: Can edit your calendar, and can send and respond to meeting requests on your behalf.
Removing Access to Calendar Accordion Closed
Step 1
To begin, click on the “Menu” button on the upper left-hand side of the Outlook Web App. Then, click on the large blue box in the drop down labeled “Calendar“.

Step 2
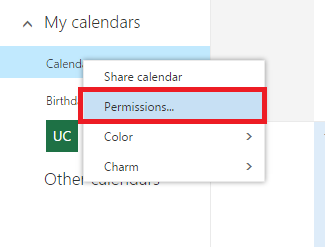
Right-click on your Calendar under “My calendars” on the left side of the browser. Then, in the following drop down menu, select “Permissions…“.
Step 3
Click on the “x” on the person you wish to remove your calendar from, or change their permissions in the drop down menu. When you are finished, click the “Save” button to remove the access that person has to your calendar.

• Other Options
Changing Calendar View Accordion Closed
Step 1
To begin, click on the “Menu” button on the upper left-hand side of Outlook Web Access. Then, click on the large blue box in the drop down labeled “Calendar“.

Step 2
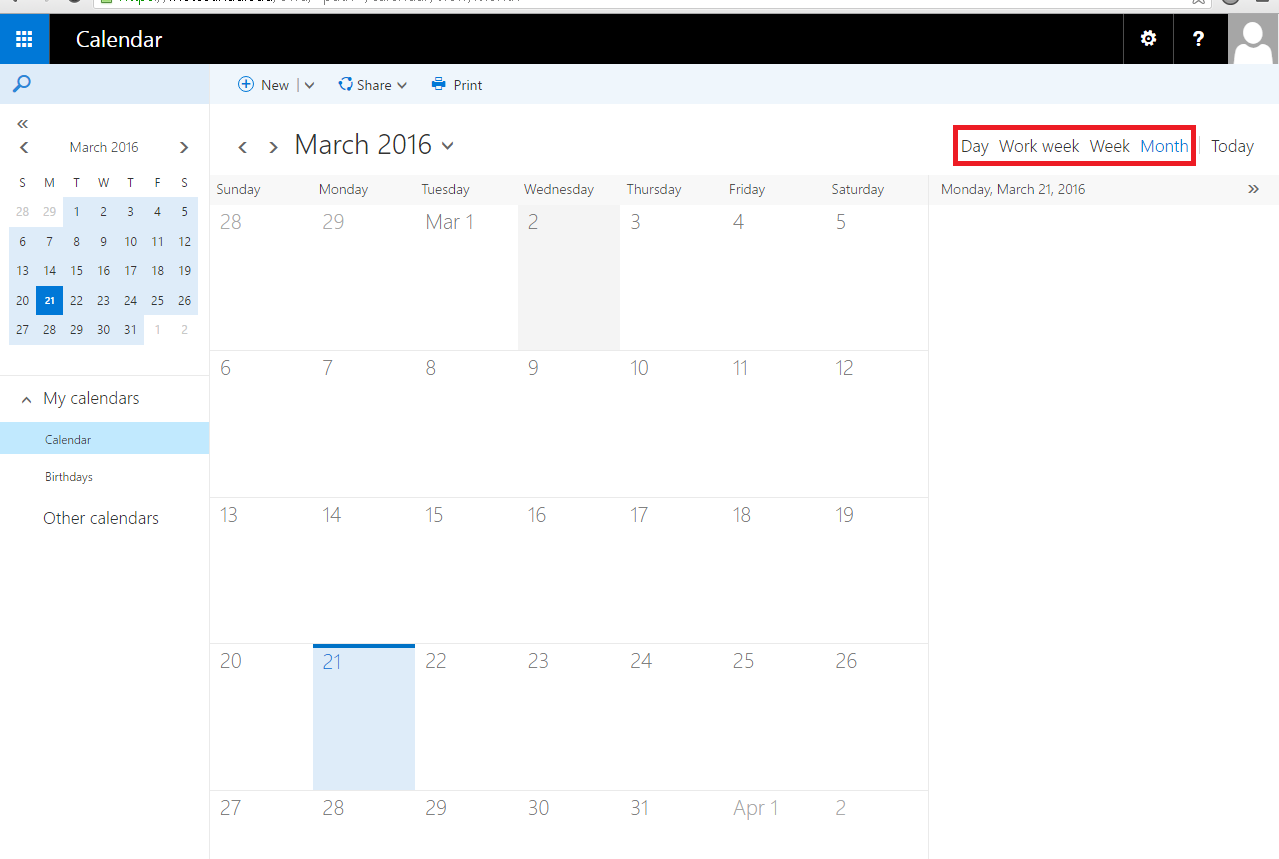
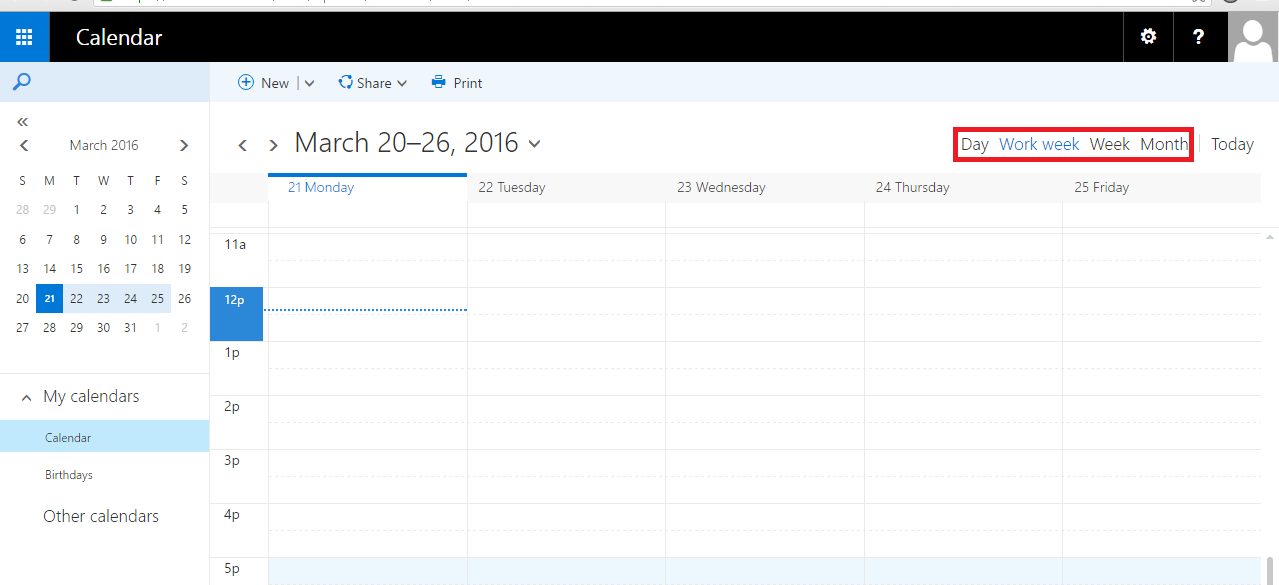
You will now be in the calendar view of the Outlook Web App. On the upper right-hand side of the window, you will see the various “Views” for your calendar including: “Day“, “Work week“, “Week“, and “Month“. The default view shows you the entire month and each day in that month.
Step 3
You can easily toggle between any view in an instant by clicking on the view that you prefer, for instance “Work week“.
Scheduling Assistant Accordion Closed
Step 1
To begin, click on the “Menu” button on the upper left-hand side of the Outlook Web App. Then, click on the large blue box in the drop down labeled “Calendar“.

Step 2
Find an event on your calendar that you wish to use the scheduling assistant with, and click on it. Then, click on the “Edit” button in the pop-up window.

Step 3
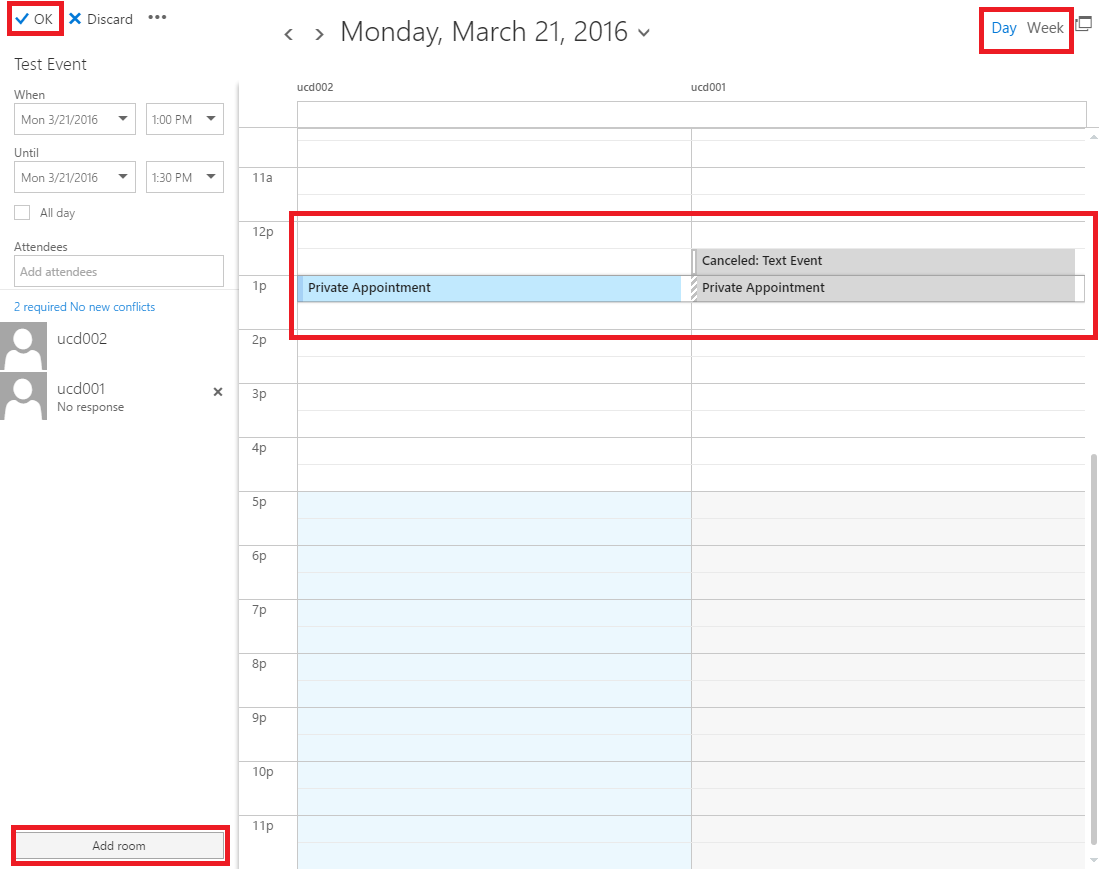
You will then be in the event editor. Click on “Scheduling Assistant” on the right-hand side of the editor to open the assistant.

Step 4
On your scheduling assistant, you can make any changes that you need to make your events scheduled easier. You can add a room number at the bottom, switch from a “Day” to a “Week” view, or adjust the event as you need. When you are finished, click the “OK” button to bring yourself back to the editor. Then, save the event.
Disable Calendar Reminders Accordion Closed
Step 1
To begin, click on the “Menu” button on the upper left-hand side of the Outlook Web App. Then, click on the large blue box in the drop down labeled “Calendar“.

Step 2
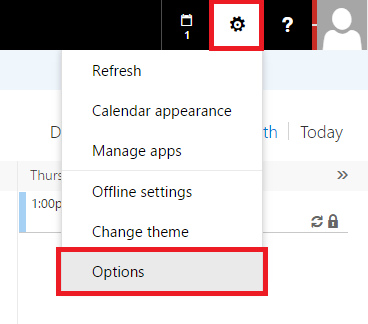
Click on the “Options Wheel” on the upper right hand side of the browser. Then, click on “Options” in the drop down menu.
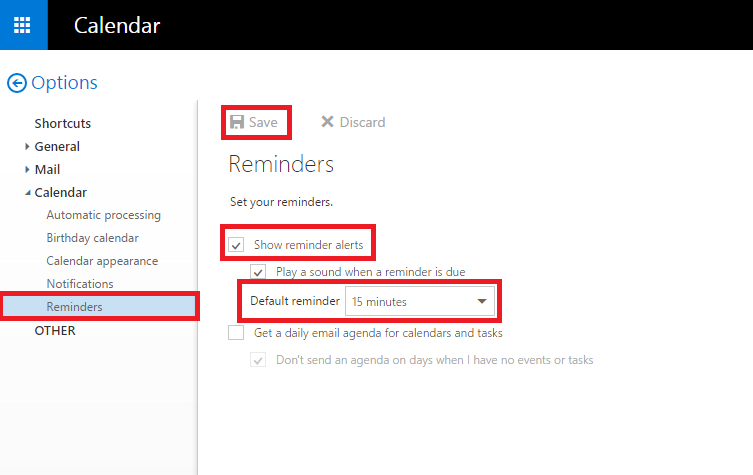
Step 3
Click on “Reminders” at the bottom of the options under “Calendar“. Here you can adjust your calendar reminders however you like, by removing them all together or by adjusting the time of your notifications. When you are finished, click the “Save” button to save your changes and then exit back to your calendar.