ITS Site Search
Technical Help

Windows BitLocker
Computer Encryption with Windows BitLocker

• Windows 7
BitLocker (TMP) Accordion Closed
Enabling BitLocker with a TPM Chip with Windows 7
Step 1
Restart the computer. When the Dell logo appears, tap the “F2” key on your keyboard repeatedly until the message “Entering Setup” appears. This will bring you to the Dell BIOS menu.

Step 2
Note: Some versions of BIOS do not allow you to navigate with a mouse or touchpad. If this is the case, use the arrow keys, space bar, and enter key on your keyboard to navigate, open, and select.
Note: The following screen shots show the BIOS of a Dell Optiplex 7020 desktop. Your computer’s BIOS may look very different, but the concepts and locations should all be the same.
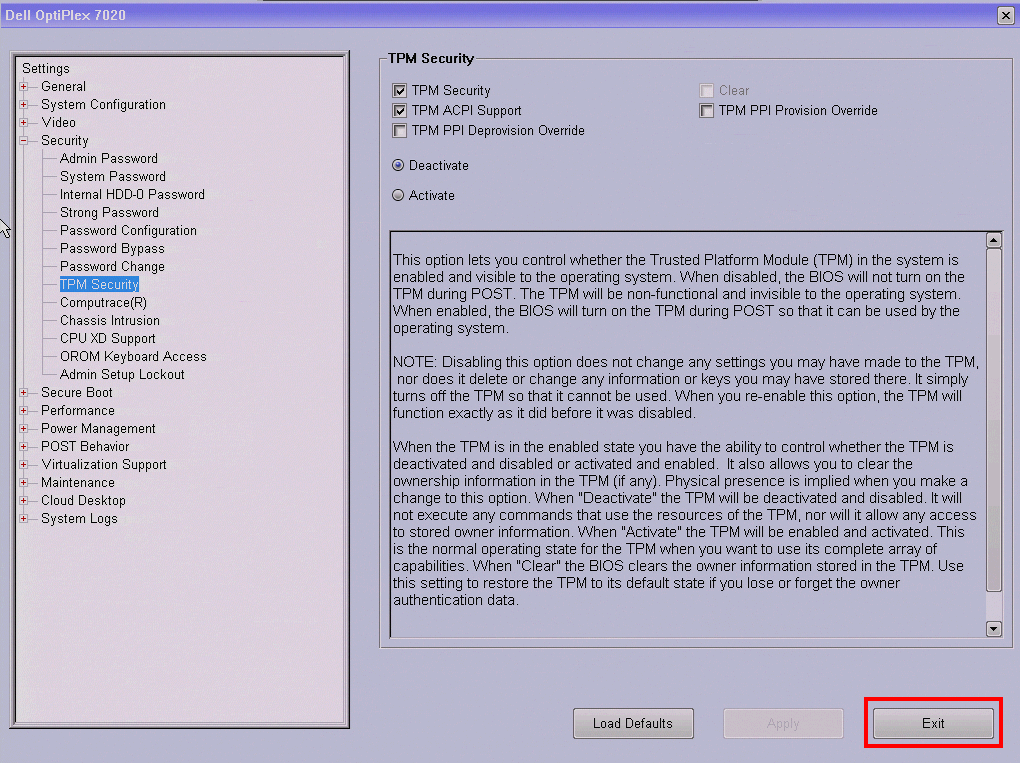
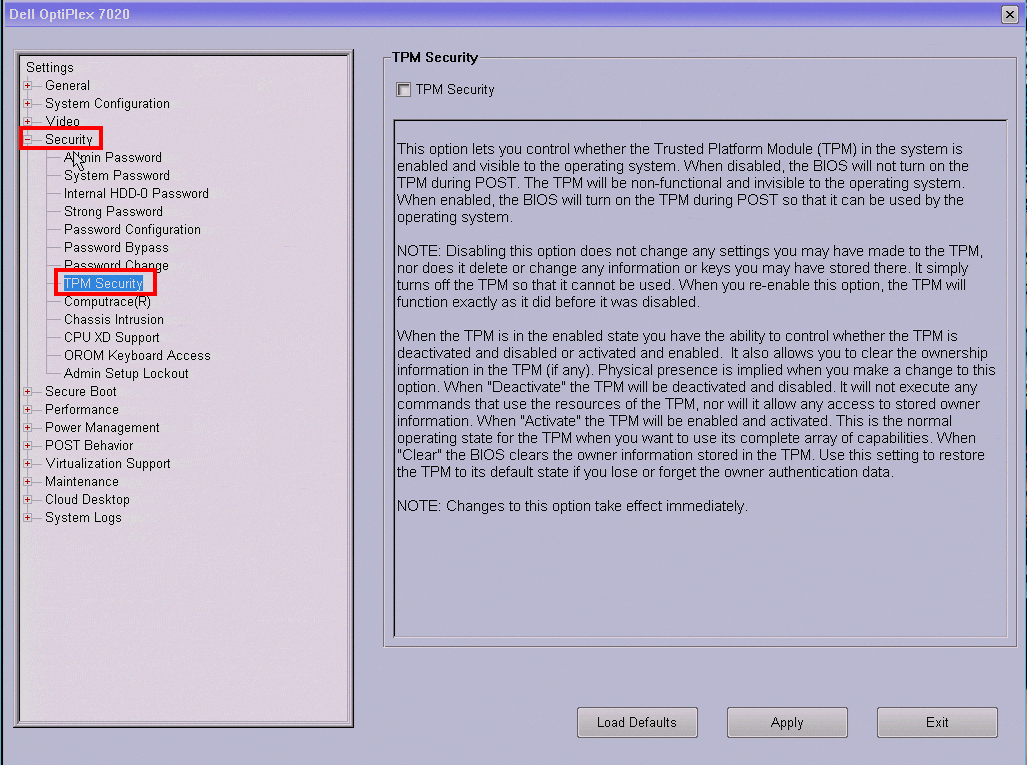
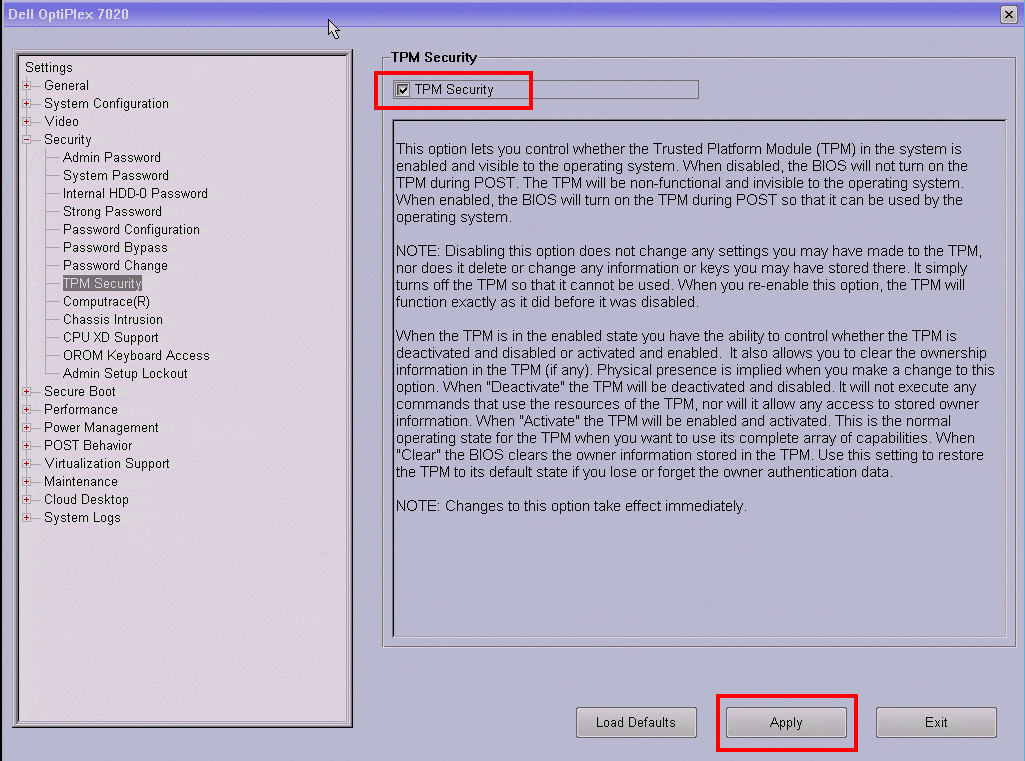
Open the “Security” tree by clicking the “+” next to it. (Note: The space bar on your keyboard will also open the tree.) Then, navigate to “TPM Security”.

Step 3
If the check box next to “TPM Security” is already checked, skip to Step 6. If it is not, check the check box next to “TPM Security”. Then, select the “Apply” button.

Step 4
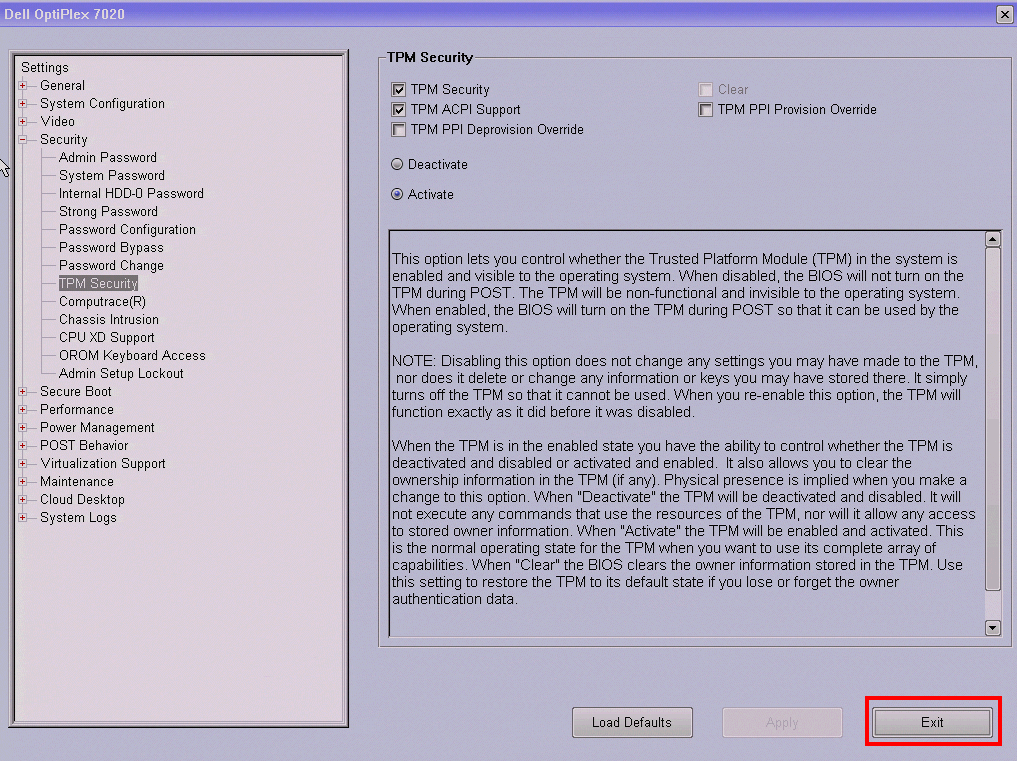
Then, select the “Exit” button.

Step 5
Repeat Step 1 to re-enter the Dell BIOS. Then, repeat Step 2 to navigate back to “Security > TPM Security”.
Step 6
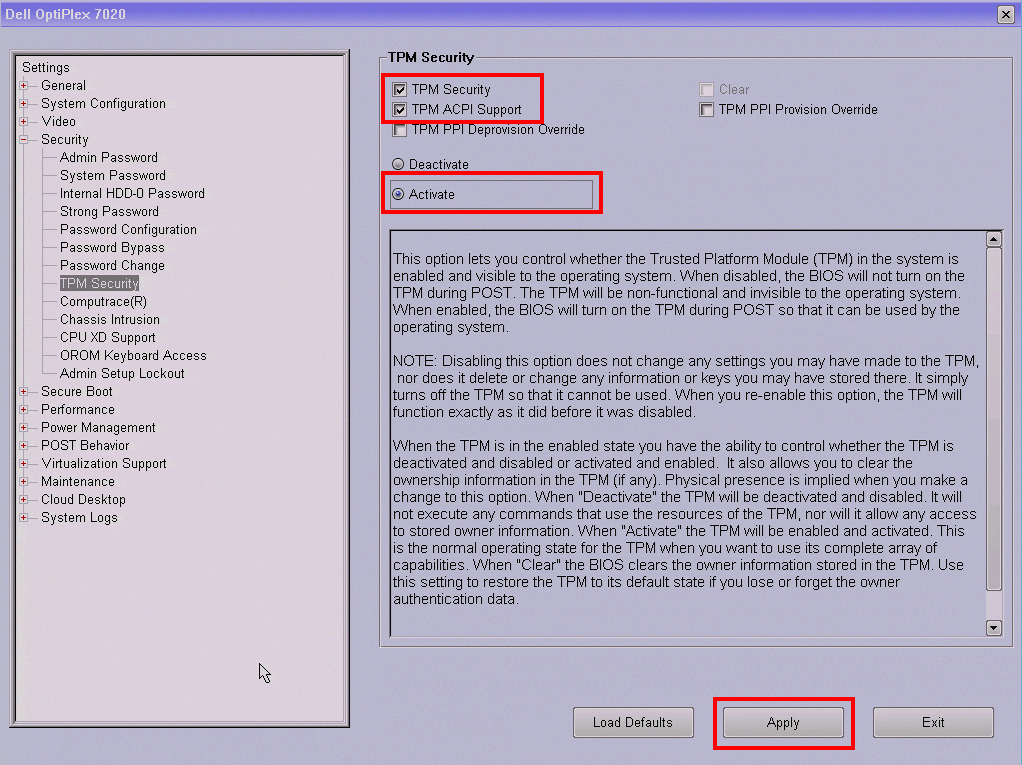
If the radio button next to “Activate” is already selected, and the check boxes next to “TPM Security” and “TPM ACPI Support” are already checked, move to Step 9. If it is not, select the radio button next to “Activate”. Ensure only the “TPM Security” and “TPM ACPI Support” check boxes are checked. Then, select the “Apply” button.

Step 7
Then, select the “Exit” button.

Step 8
Repeat Step 1 to re-enter the Dell BIOS.
Step 9
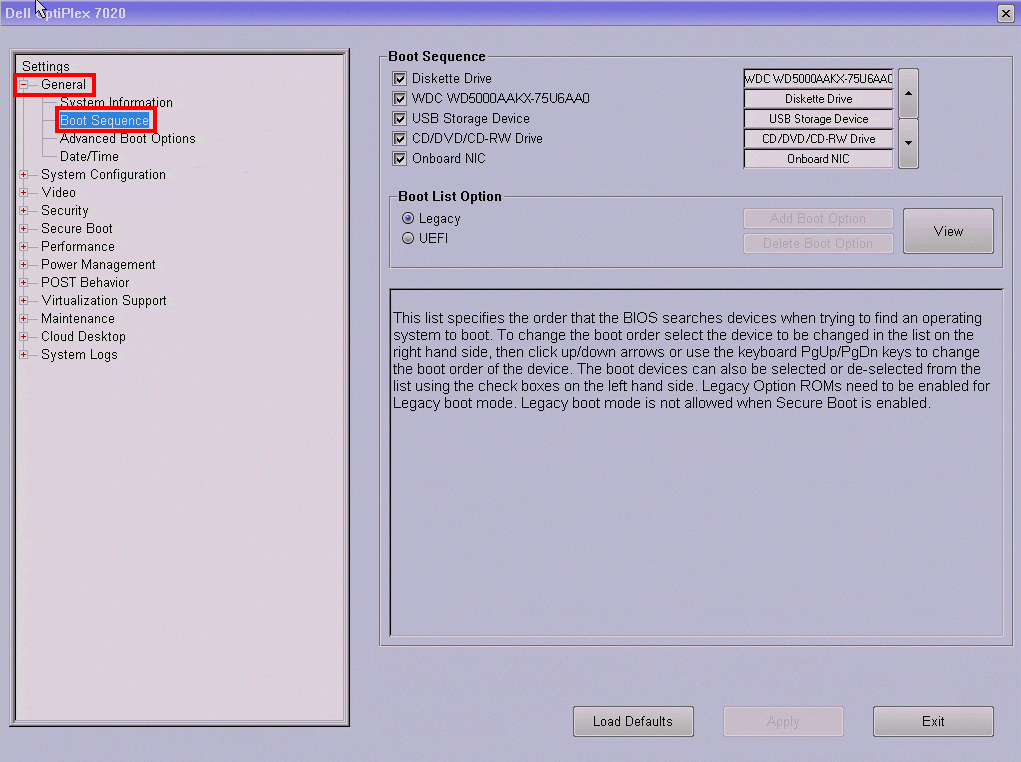
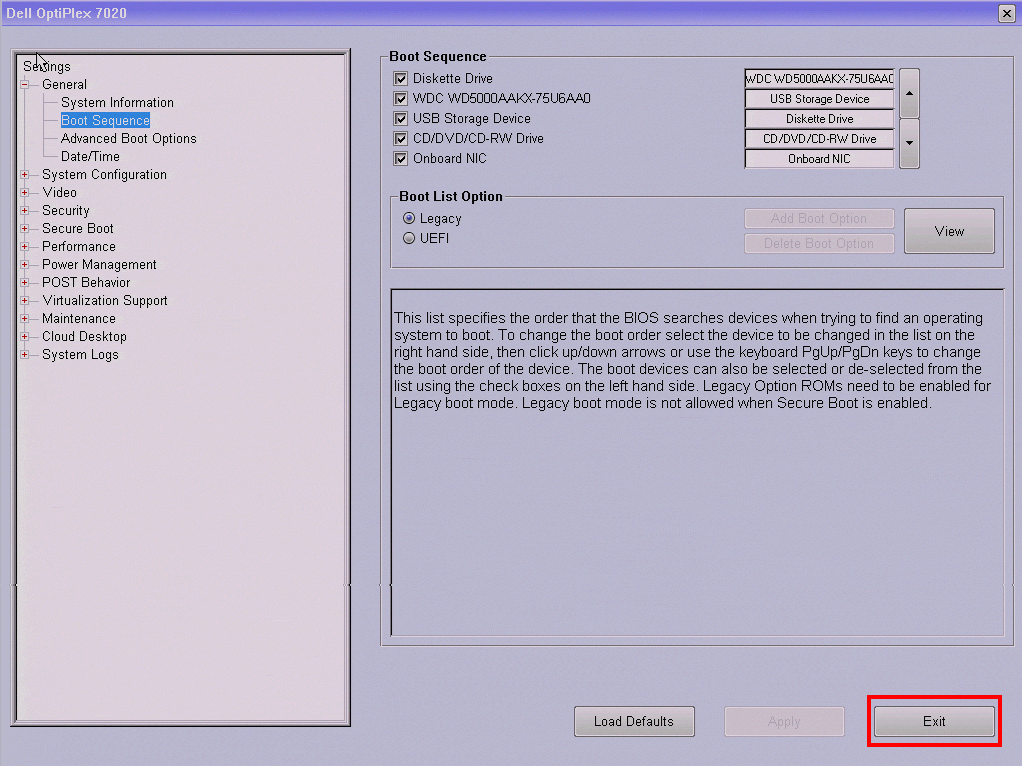
Open the “General” tree by clicking the “+” next to it. (Note: The space bar on your keyboard will also open the tree.) Then, navigate to “Boot Sequence”.

Step 10
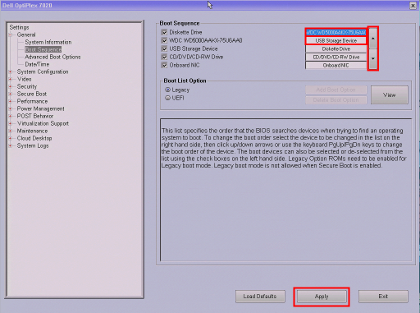
In the Boot Sequence list, ensure that the “internal HDD” is above “USB Storage Device”. If it is not, select the item in the list and use the arrow buttons beside the list to move the selected item up or down. Then, select the “Apply” button.
(Note: The internal HDD in this example is listed as “WDC WD5000AAKX-75U6AAC”, and can be listed as something very different in your machine.)
Step 11
Then, select the “Exit” button. Allow the machine to boot Windows normally.

Step 12
Log onto Windows using an NAU domain account that has Administrator privileges.
Step 13
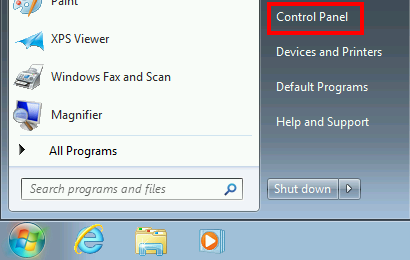
Open the Start Menu (usually located in the bottom-left hand corner).

Step 14
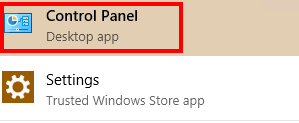
Click on “Control Panel” from the Start Menu.
Step 15
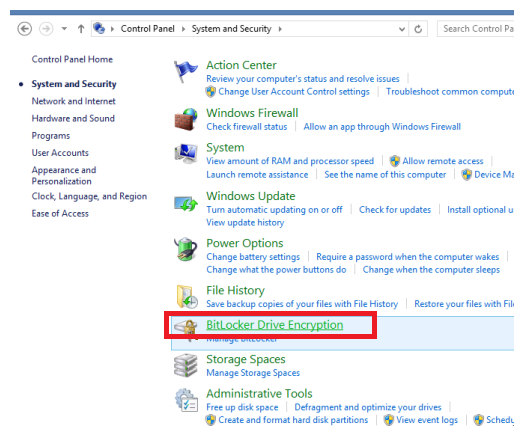
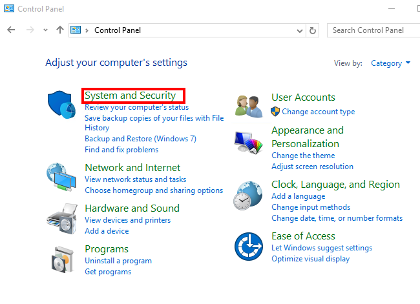
From the Control Panel menu, click on “System and Security”.

Step 16
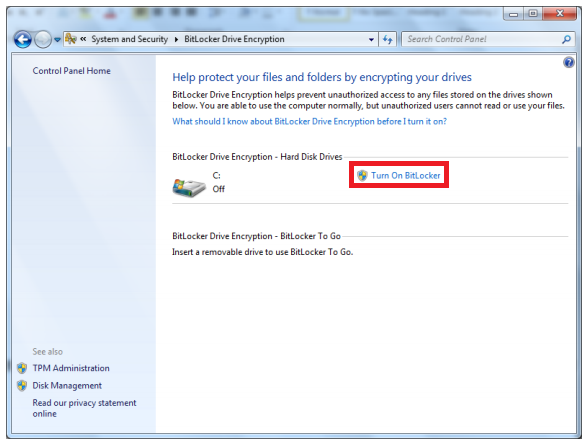
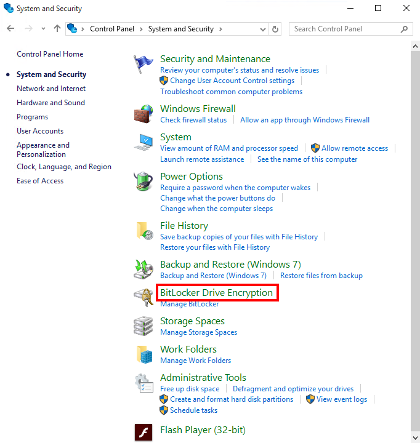
From the System and Security menu, click on “BitLocker Drive Encryption”.
Step 17
Click “Turn on Bitlocker”.

Step 18
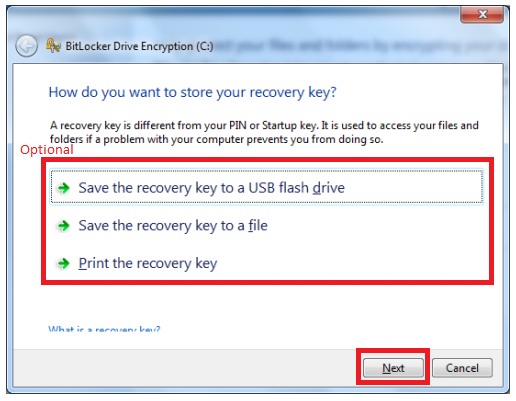
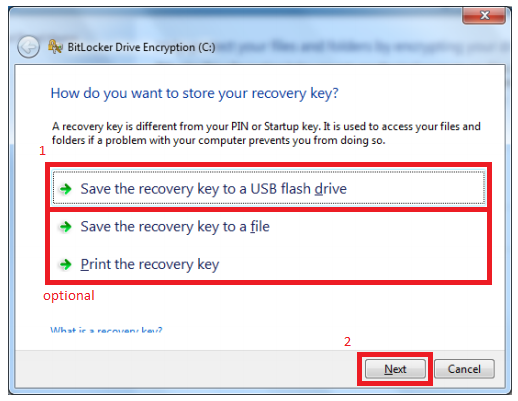
When you get to the window asking “How do you want to store your recovery key?”, you may select any of the given options to store and save your recovery key. The key will automatically be sent to an NAU database.
Note: If you choose to create a backup recovery key, do NOT store it anywhere near the computer it unlocks.
Once you have decided what to do with your recovery key, click “Next”.
Step 19
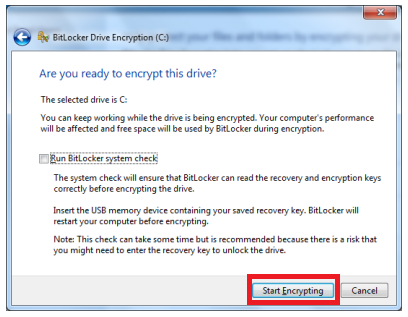
Click “Start Encrypting” to begin the encryption process.
Note: The encryption will likely take several hours to complete. The computer may be used as normal during this time. If the computer is shut down, the encryption process will pause until the computer is turned on again.
BitLocker (USB) Accordion Closed
Enabling BitLocker with a USB Key with Windows 7
Step 1
Restart the computer. When the Dell logo appears, tap the “F2” key on your keyboard repeatedly until the message “Entering Setup” appears. This will bring you to the Dell BIOS menu.
Step 2
Note: Some versions of BIOS do not allow you to navigate with a mouse or touchpad. If this is the case, use the arrow keys, space bar, and enter key on your keyboard to navigate, open, and select.
Note: The following screen shots show the BIOS of a Dell Optiplex 7020 desktop. Your computer’s BIOS may look very different, but the concepts and locations should all be the same.
Open the “General” tree by clicking the “+” next to it. (Note: The space bar on your keyboard will also open the tree.) Then, navigate to “Boot Sequence”.
Step 3
In the Boot Sequence list, ensure that the “internal HDD” is above “USB Storage Device”. If it is not, select the item in the list and use the arrow buttons beside the list to move the selected item up or down. Then, select the “Apply” button.
(Note: The internal HDD in this example is listed as “WDC WD5000AAKX-75U6AAC”, and can be listed as something very different in your machine.)
Step 4
Then, select the “Exit” button. Allow the machine to boot Windows normally.
Step 5
Log onto Windows using an NAU domain account that has Administrator privileges.
Step 6
Open the Start Menu (usually located in the bottom-left hand corner).
Step 7
Click on “Control Panel” from the Start Menu.
Step 8
From the Control Panel menu, click on “System and Security”.
Step 9
From the System and Security menu, click on “BitLocker Drive Encryption”.
Step 10
Click “Turn on Bitlocker”.
Step 11
When you get to the window asking “How do you want to store your recovery key?”, click on the “Save the recovery key to a USB flash drive” option. You may choose any of the other options as well to back up your recovery key. The key will automatically be sent to an NAU database.
Note: If you choose to create a backup recovery key, do NOT store it anywhere near the computer it unlocks.
Then, click “Next”.

Step 12
Click “Start Encrypting” to begin the encryption process.
Note: The encryption will likely take several hours to complete. The computer may be used as normal during this time. If the computer is shut down, the encryption process will pause until the computer is turned on again.
BitLocker – Suspend Protection Accordion Closed
Suspending BitLocker Protection with Windows 7
Step 1
Open the Start Menu (usually located in the bottom-left hand corner).
Step 2
Click on “Control Panel” from the Start Menu.
Step 3
From the Control Panel menu, click on “System and Security”.
Step 4
From the System and Security menu, click on “BitLocker Drive Encryption”.
Step 5
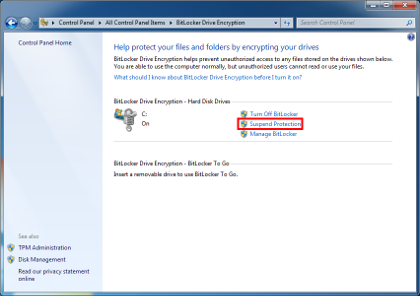
Under “BitLocker Drive Encryption – Hard Disk Drives”, select “Suspend Protection”.
Step 6
When the dialog box prompts asking “Do you want to suspend BitLocker Drive Encryption”, click the “Yes” button.
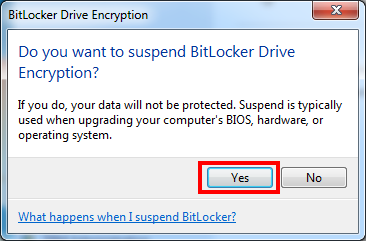
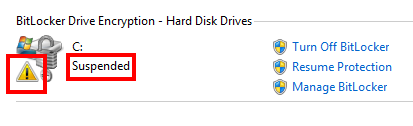
The BitLocker Drive Encryption will now list its status as “Suspended” with a exclamation point inside a yellow triangle over the drive logo.
BitLocker – Resume Protection Accordion Closed
Resuming BitLocker Protection with Windows 7
Step 1
Open the Start Menu (usually located in the bottom-left hand corner).
Step 2
Click on “Control Panel” from the Start Menu.
Step 3
From the Control Panel menu, click on “System and Security”.
Step 4
From the System and Security menu, click on “BitLocker Drive Encryption”.
Step 5
Under “BitLocker drive Encryption – Hard Disk Drives”, select “Resume Protection”.

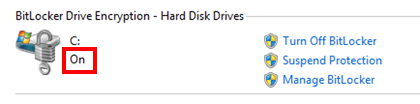
The BitLocker Drive Encryption will now list its status as “On”.
BitLocker – Save a Copy of the Recovery Key Accordion Closed
Saving a Copy of the BitLocker Recovery Key with Windows 7
Step 1
Open the Start Menu (usually located in the bottom-left hand corner).
Step 2
Click on “Control Panel” from the Start Menu.
Step 3
From the Control Panel menu, click on “System and Security”.
Step 4
From the System and Security menu, click on “BitLocker Drive Encryption”.
Step 5
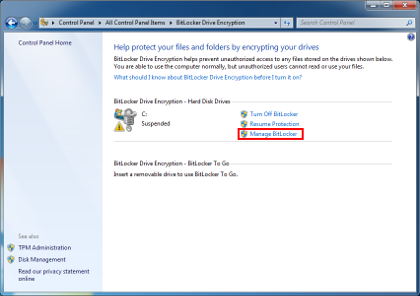
Under “BitLocker drive Encryption – Hard Disk Drives”, select “Manage BitLocker”.
Step 6
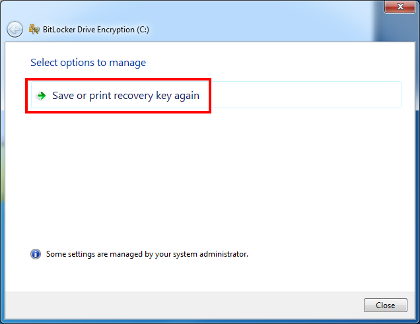
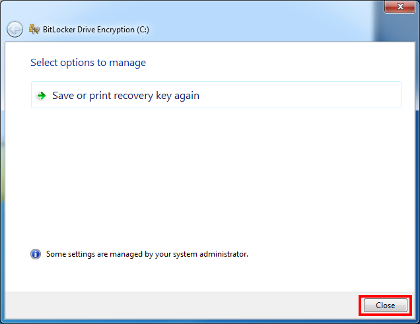
Select “Save or print recovery key again”.
Step 7
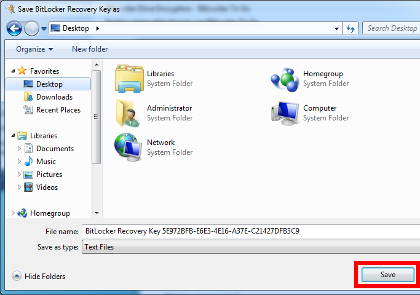
The File Explorer window will open. Select a location (either a USB or network drive) to save your recover key to. Then, click “Save”. (Note: You will receive an error if you attempt to save the recovery key to an encrypted drive.)
Step 8
Once you have saved the file, click the “Close” button.
• Windows 8
BitLocker (TPM) Accordion Closed
Enabling BitLocker with a TPM Chip with Windows 8
Step 1
Restart the computer. When the Dell logo appears, tap the “F2” key on your keyboard repeatedly until the message “Entering Setup” appears. This will bring you to the Dell BIOS menu.

Step 2
Note: Some versions of BIOS do not allow you to navigate with a mouse or touchpad. If this is the case, use the arrow keys, space bar, and enter key on your keyboard to navigate, open, and select.
Note: The following screen shots show the BIOS of a Dell Optiplex 7020 desktop. Your computer’s BIOS may look very different, but the concepts and locations should all be the same.
Open the “Security” tree by clicking the “+” next to it. (Note: The space bar on your keyboard will also open the tree.) Then, navigate to “TPM Security”.

Step 3
If the check box next to “TPM Security” is already checked, skip to Step 6. If it is not, check the check box next to “TPM Security”. Then, select the “Apply” button.

Step 4
Then, select the “Exit” button.
Step 5
Repeat Step 1 to re-enter the Dell BIOS. Then, repeat Step 2 to navigate back to “Security > TPM Security”.
Step 6
If the radio button next to “Activate” is already selected, and the check boxes next to “TPM Security” and “TPM ACPI Support” are already checked, move to Step 9. If it is not, select the radio button next to “Activate”. Ensure only the “TPM Security” and “TPM ACPI Support” check boxes are checked. Then, select the “Apply” button.

Step 7
Then, select the “Exit” button.

Step 8
Repeat Step 1 to re-enter the Dell BIOS.
Step 9
Open the “General” tree by clicking the “+” next to it. (Note: The space bar on your keyboard will also open the tree.) Then, navigate to “Boot Sequence”.

Step 10
In the Boot Sequence list, ensure that the “internal HDD” is above “USB Storage Device”. If it is not, select the item in the list and use the arrow buttons beside the list to move the selected item up or down. Then, select the “Apply” button.
(Note: The internal HDD in this example is listed as “WDC WD5000AAKX-75U6AAC”, and can be listed as something very different in your machine.)

Step 11
Then, select the “Exit” button. Allow the machine to boot Windows normally.

Step 12
Log onto Windows using an NAU domain account that has Administrator privileges.
Step 13
Open the Start Menu (usually located in the bottom-left hand corner).

Step 14
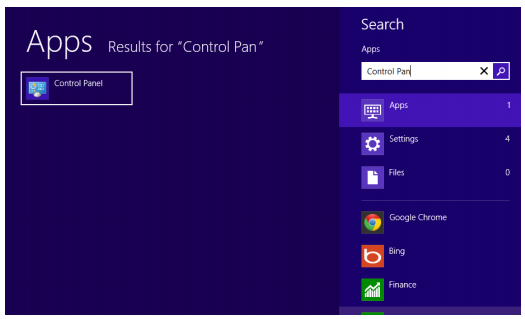
Search for the “Control Panel”. To begin searching within the Start Menu, simply just start typing “control panel” (it is NOT necessary to click inside a search bar). When the Control Panel application appears, click to open it.
Step 15
From the Control Panel menu, click on “System and Security”.

Step 16
From the System and Security menu, click on “BitLocker Drive Encryption”.

Step 17
Click “Turn on Bitlocker”.
Step 18
When you get to the window asking “How do you want to store your recovery key?”, you may select any of the given options to store and save your recovery key. The key will automatically be sent to an NAU database.
Note: If you choose to create a backup recovery key, do NOT store it anywhere near the computer it unlocks.
Once you have decided what to do with your recovery key, click “Next”.

Step 19
Click “Start Encrypting” to begin the encryption process.
Note: The encryption will likely take several hours to complete. The computer may be used as normal during this time. If the computer is shut down, the encryption process will pause until the computer is turned on again.

BitLocker (USB) Accordion Closed
Enabling BitLocker with a USB Key with Windows 8
Step 1
Restart the computer. When the Dell logo appears, tap the “F2” key on your keyboard repeatedly until the message “Entering Setup” appears. This will bring you to the Dell BIOS menu.
Step 2
Note: Some versions of BIOS do not allow you to navigate with a mouse or touchpad. If this is the case, use the arrow keys, space bar, and enter key on your keyboard to navigate, open, and select.
Note: The following screen shots show the BIOS of a Dell Optiplex 7020 desktop. Your computer’s BIOS may look very different, but the concepts and locations should all be the same.
Open the “General” tree by clicking the “+” next to it. (Note: The space bar on your keyboard will also open the tree.) Then, navigate to “Boot Sequence”.
Step 3
In the Boot Sequence list, ensure that the “internal HDD” is above “USB Storage Device”. If it is not, select the item in the list and use the arrow buttons beside the list to move the selected item up or down. Then, select the “Apply” button.
(Note: The internal HDD in this example is listed as “WDC WD5000AAKX-75U6AAC”, and can be listed as something very different in your machine.)
Step 4
Then, select the “Exit” button. Allow the machine to boot Windows normally.
Step 5
Log onto Windows using an NAU domain account that has Administrator privileges.
Step 6
Open the Start Menu (usually located in the bottom-left hand corner).
Step 7
Search for the “Control Panel”. To begin searching within the Start Menu, simply just start typing “control panel” (it is NOT necessary to click inside a search bar). When the Control Panel application appears, click to open it.
Step 8
From the Control Panel menu, click on “System and Security”.
Step 9
From the System and Security menu, click on “BitLocker Drive Encryption”.
Step 10
Click “Turn on Bitlocker”.
Step 11
When you get to the window asking “How do you want to store your recovery key?”, click on the “Save the recovery key to a USB flash drive” option. You may choose any of the other options as well to back up your recovery key. The key will automatically be sent to an NAU database.
Note: If you choose to create a backup recovery key, do NOT store it anywhere near the computer it unlocks.
Then, click “Next”.
Step 12
Click “Start Encrypting” to begin the encryption process.
Note: The encryption will likely take several hours to complete. The computer may be used as normal during this time. If the computer is shut down, the encryption process will pause until the computer is turned on again.
BitLocker – Suspend Protection Accordion Closed
Suspending BitLocker Protection with Windows
Step 1
Open the Start Menu (usually located in the bottom-left hand corner).
Step 2
Search for the “Control Panel”. To begin searching within the Start Menu, simply just start typing “control panel” (it is NOT necessary to click inside a search bar). When the Control Panel application appears, click to open it.
Step 3
From the Control Panel menu, click on “System and Security”.
Step 4
From the System and Security menu, click on “BitLocker Drive Encryption”.
Step 5
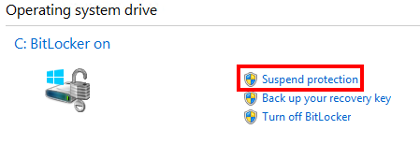
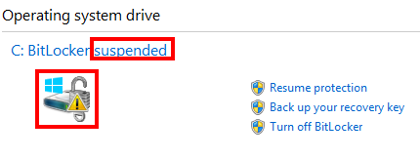
Under “Operating system drive”, select “Suspend protection”.
Step 6
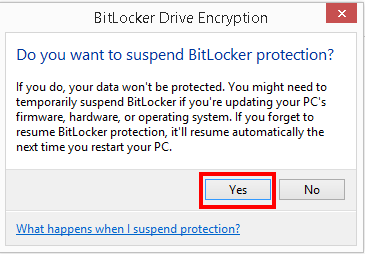
When the dialog box prompts asking “Do you want to suspend BitLocker Drive Encryption”, click the “Yes” button.
The BitLocker Drive Encryption will now list its status as “suspended” with a exclamation point inside a yellow triangle over the drive logo.
BitLocker – Resume Protection Accordion Closed
Resuming BitLocker Protection with Windows 8
Step 1
Open the Start Menu (usually located in the bottom-left hand corner).
Step 2
Search for the “Control Panel”. To begin searching within the Start Menu, simply just start typing “control panel” (it is NOT necessary to click inside a search bar). When the Control Panel application appears, click to open it.
Step 3
From the Control Panel menu, click on “System and Security”.
Step 4
From the System and Security menu, click on “BitLocker Drive Encryption”.
Step 5
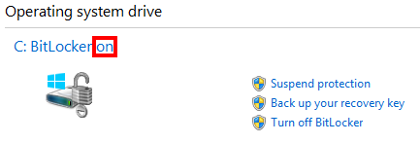
Under “Operating system drive”, select “Resume protection”.
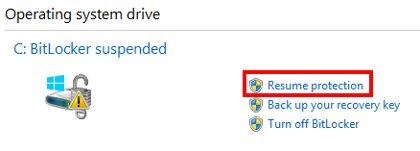
The BitLocker Drive Encryption will now list its status as “on”.
BitLocker – Save a Copy of the Recovery Key Accordion Closed
Resuming BitLocker Protection with Windows 8
Step 1
Open the Start Menu (usually located in the bottom-left hand corner).
Step 2
Search for the “Control Panel”. To begin searching within the Start Menu, simply just start typing “control panel” (it is NOT necessary to click inside a search bar). When the Control Panel application appears, click to open it.
Step 3
From the Control Panel menu, click on “System and Security”.
Step 4
From the System and Security menu, click on “BitLocker Drive Encryption”.
Step 5
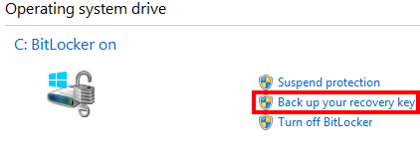
Under “Operating system drive”, select “Back up your recovery key”.
Step 6
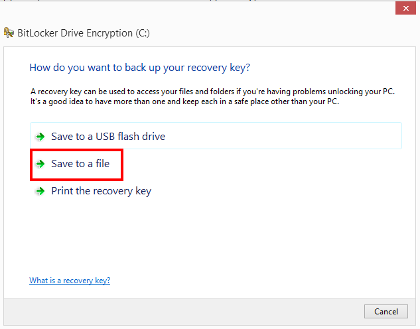
When asked “How do you want to back up your recovery key?”, select “Save to a file”. (Note: You may also choose to print the recovery key.)
Step 7
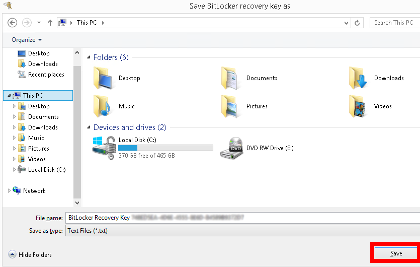
The File Explorer window will open. Select a location (either a USB or network drive) to save your recover key to. Then, click “Save”. (Note: You will receive an error if you attempt to save the recovery key to an encrypted drive.)
Step 8
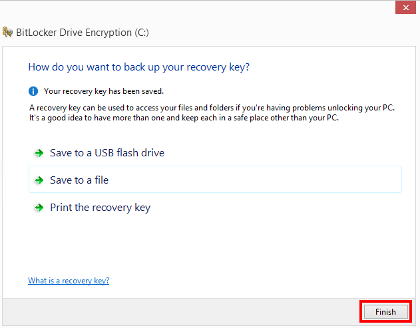
Once you have saved the file, click the “Finish” button.
• Windows 10
BitLocker (TPM) Accordion Closed
Enabling BitLocker with a TPM Chip with Windows 10
Step 1
Restart the computer. When the Dell logo appears, tap the “F2” key on your keyboard repeatedly until the message “Entering Setup” appears. This will bring you to the Dell BIOS menu.

Step 2
Note: Some versions of BIOS do not allow you to navigate with a mouse or touchpad. If this is the case, use the arrow keys, space bar, and enter key on your keyboard to navigate, open, and select.
Note: The following screen shots show the BIOS of a Dell Optiplex 7020 desktop. Your computer’s BIOS may look very different, but the concepts and locations should all be the same.
Open the “Security” tree by clicking the “+” next to it. (Note: The space bar on your keyboard will also open the tree.) Then, navigate to “TPM Security”.
Step 3
If the check box next to “TPM Security” is already checked, skip to Step 6. If it is not, check the check box next to “TPM Security”. Then, select the “Apply” button.
Step 4
Then, select the “Exit” button.

Step 5
Repeat Step 1 to re-enter the Dell BIOS. Then, repeat Step 2 to navigate back to “Security > TPM Security”.
Step 6
If the radio button next to “Activate” is already selected, and the check boxes next to “TPM Security” and “TPM ACPI Support” are already checked, move to Step 9. If it is not, select the radio button next to “Activate”. Ensure only the “TPM Security” and “TPM ACPI Support” check boxes are checked. Then, select the “Apply” button.
Step 7
Then, select the “Exit” button.
Step 8
Repeat Step 1 to re-enter the Dell BIOS.
Step 9
Open the “General” tree by clicking the “+” next to it. (Note: The space bar on your keyboard will also open the tree.) Then, navigate to “Boot Sequence”.
Step 10
In the Boot Sequence list, ensure that the “internal HDD” is above “USB Storage Device”. If it is not, select the item in the list and use the arrow buttons beside the list to move the selected item up or down. Then, select the “Apply” button.
(Note: The internal HDD in this example is listed as “WDC WD5000AAKX-75U6AAC”, and can be listed as something very different in your machine.)

Step 11
Then, select the “Exit” button. Allow the machine to boot Windows normally.
Step 12
Log onto Windows using an NAU domain account that has Administrator privileges.
Step 13
Open the Start Menu (usually located in the bottom-left hand corner of the desktop).

Step 14
Search for the “Control Panel”. To begin searching within the Start Menu, simply just start typing “control panel” (it is NOT necessary to click inside a search bar). When the Control Panel application appears, click to open it.
Step 15
From the Control Panel menu, click on “System and Security”.
Step 16
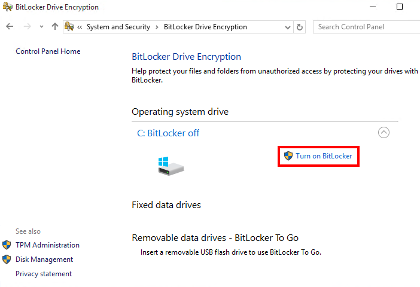
From the System and Security menu, click on “BitLocker Drive Encryption”.
Step 17
From the BitLocker Drive Encryption menu, click “Turn on BitLocker”.
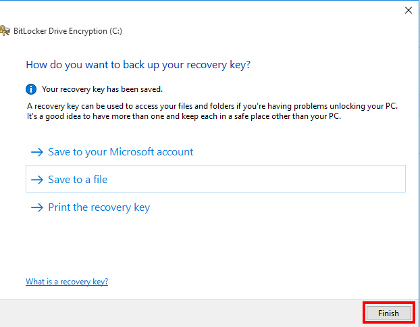
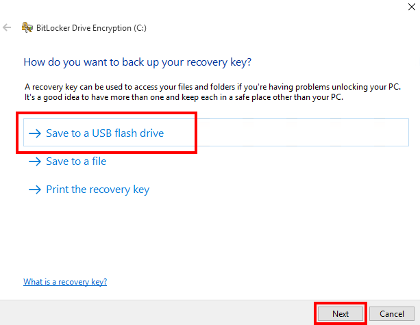
Step 18
When you get to the window asking “How do you want to back up your recovery key?”, you may select any of the given options to store and save your recovery key. The key will automatically be sent to an NAU database.
Note: If you choose to create a backup recovery key, do NOT store it anywhere near the computer it unlocks.
Once you have decided what to do with your recovery key, click “Next”.

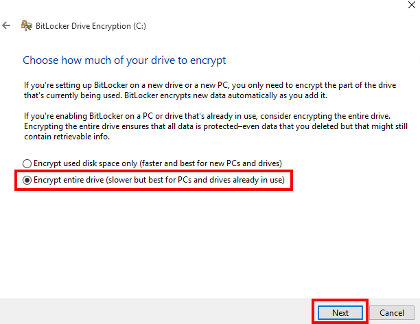
Step 19
From the “Choose how much of your drive to encrypt” menu, select “Encrypt entire drive”. Then, click “Next”.
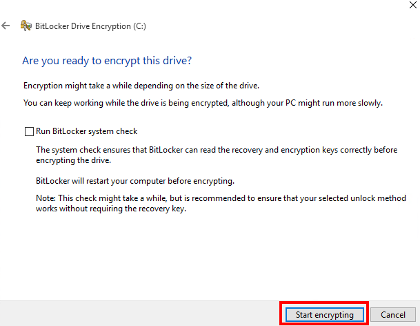
Step 20
Click on “Start encrypting”.
Note: The encryption will likely take several hours to complete. The computer may be used as normal during this time, but you might see a decrease in your PC’s performance. If the computer is shut down, the encryption process will pause until the computer is turned on again.
BitLocker (USB) Accordion Closed
Enabling BitLocker with a USB Key with Windows 10
Step 1
Restart the computer. When the Dell logo appears, tap the “F2” key on your keyboard repeatedly until the message “Entering Setup” appears. This will bring you to the Dell BIOS menu.
Step 2
Note: Some versions of BIOS do not allow you to navigate with a mouse or touchpad. If this is the case, use the arrow keys, space bar, and enter key on your keyboard to navigate, open, and select.
Note: The following screen shots show the BIOS of a Dell Optiplex 7020 desktop. Your computer’s BIOS may look very different, but the concepts and locations should all be the same.
Open the “General” tree by clicking the “+” next to it. (Note: The space bar on your keyboard will also open the tree.) Then, navigate to “Boot Sequence”.
Step 3
In the Boot Sequence list, ensure that the “internal HDD” is above “USB Storage Device”. If it is not, select the item in the list and use the arrow buttons beside the list to move the selected item up or down. Then, select the “Apply” button.
(Note: The internal HDD in this example is listed as “WDC WD5000AAKX-75U6AAC”, and can be listed as something very different in your machine.)
Step 4
Then, select the “Exit” button. Allow the machine to boot Windows normally.
Step 5
Log onto Windows using an NAU domain account that has Administrator privileges.
Step 6
Open the Start Menu (usually located in the bottom-left hand corner of the desktop).
Step 7
Search for the “Control Panel”. To begin searching within the Start Menu, simply just start typing “control panel” (it is NOT necessary to click inside a search bar). When the Control Panel application appears, click to open it.
Step 8
From the Control Panel menu, click on “System and Security”.
Step 9
From the System and Security menu, click on “BitLocker Drive Encryption”.
Step 10
From the BitLocker Drive Encryption menu, click “Turn on BitLocker”.
Step 11
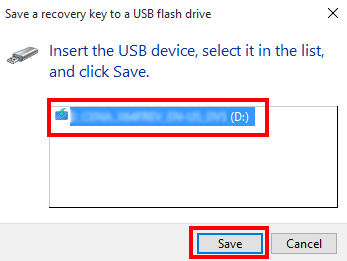
When you get to the window asking “How do you want to back up your recovery key?”, click on the “Save to a USB flash drive” option. You may choose any of the other options as well to back up your recovery key.
Select the USB you would like to save the recovery key to. Then, click “Save”. The key will automatically be sent to an NAU database.
Note: If you choose to create a backup recovery key, do NOT store it anywhere near the computer it unlocks.
Once you have saved your recovery key to a USB device, click “Next” back on the recovery key options menu.
Step 12
From the “Choose how much of your drive to encrypt” menu, select “Encrypt entire drive”. Then, click “Next”.
Step 13
Click on “Start encrypting”.
Note: The encryption will likely take several hours to complete. The computer may be used as normal during this time, but you might see a decrease in your PC’s performance. If the computer is shut down, the encryption process will pause until the computer is turned on again.
BitLocker – Suspend Protection Accordion Closed
Suspending BitLocker Protection with Windows 10
Step 1
Open the Start Menu (usually located in the bottom-left hand corner of the desktop).
Step 2
Search for the “Control Panel”. To begin searching within the Start Menu, simply just start typing “control panel” (it is NOT necessary to click inside a search bar). When the Control Panel application appears, click to open it.
Step 3
From the Control Panel menu, click on “System and Security”.
Step 4
From the System and Security menu, click on “BitLocker Drive Encryption”.
Step 5
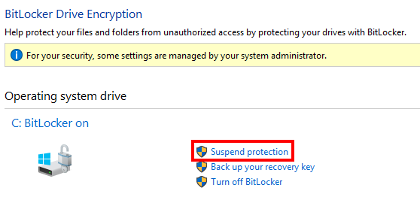
Under “Operating system drive”, select “Suspend protection”.
Step 6
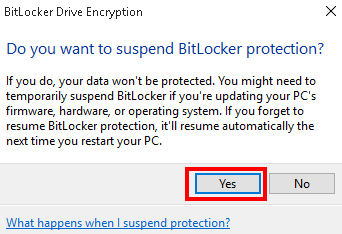
When the dialog box prompts asking “Do you want to suspend BitLocker Drive Encryption”, click the “Yes” button.
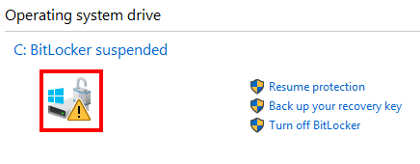
The BitLocker Drive Encryption will now list its status as suspended with a exclamation point inside a yellow triangle over the drive logo.
BitLocker – Resume Protection Accordion Closed
Resuming BitLocker Protection with Windows 10
Step 1
Open the Start Menu (usually located in the bottom-left hand corner of the desktop).
Step 2
Search for the “Control Panel”. To begin searching within the Start Menu, simply just start typing “control panel” (it is NOT necessary to click inside a search bar). When the Control Panel application appears, click to open it.
Step 3
From the Control Panel menu, click on “System and Security”.
Step 4
From the System and Security menu, click on “BitLocker Drive Encryption”.
Step 5
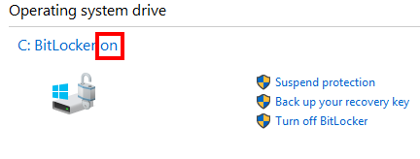
Under “Operating system drive”, select “Resume protection”.
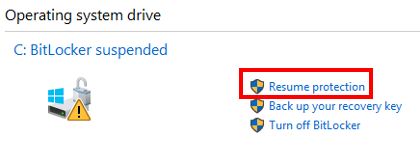
The BitLocker Drive Encryption will now list its status as “on”.
BitLocker – Save a Copy of the Recovery Key Accordion Closed
Step 1
Open the Start Menu (usually located in the bottom-left hand corner of the desktop).
Step 2
Search for the “Control Panel”. To begin searching within the Start Menu, simply just start typing “control panel” (it is NOT necessary to click inside a search bar). When the Control Panel application appears, click to open it.
Step 3
From the Control Panel menu, click on “System and Security”.
Step 4
From the System and Security menu, click on “BitLocker Drive Encryption”.
Step 5
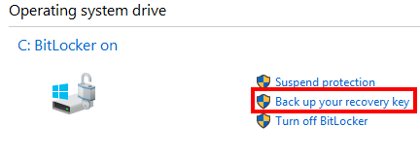
Under “Operating system drive”, select “Back up your recovery key”.
Step 6
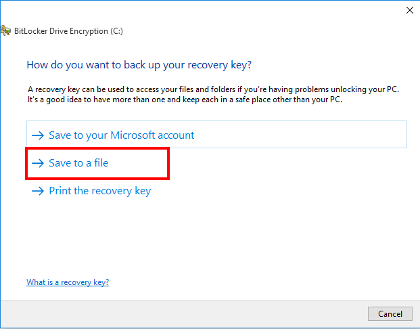
When asked “How do you want to back up your recovery key?”, select “Save to a file”. (Note: You may also choose to print the recovery key.)
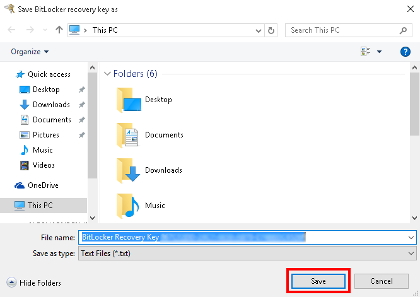
Step 7
The File Explorer window will open. Select a location (either a USB or network drive) to save your recover key to. Then, click “Save”. (Note: You will receive an error if you attempt to save the recovery key to an encrypted drive.)
Step 8
Once you have saved the file, click the “Finish” button.