Academic unit site support
Business unit site support
Photographer Requests
To request a photographer at your next event, contact NAU Marketing or complete a UM Project Request.Adding images to a page
Note: All images used on your site should be accessed from the NAU Online Photo Gallery. If you have any questions about the use of photos on your website, please contact Rayma Lee from NAU Marketing.
Watch the Image Callout and Image Caption video
Step 1: Access the Media Library
Adding media to your WordPress site adds it to your Media Library, so you can access the same media from any Page or Post in your site.
There are several methods to access the Upload New Media or Medial Library:
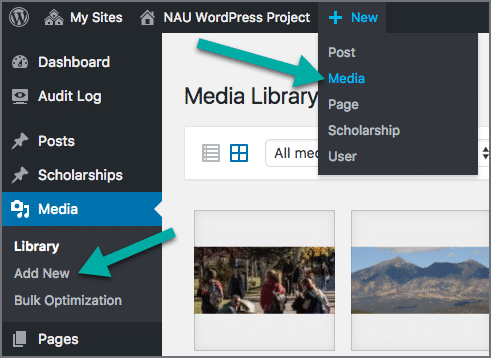
- Click Media from the side menu, then select Add New
- Click + New from the top menu, then select Media
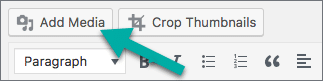
- In the Page or Post editing view, click Add Media above the text editor
Step 2: Add media to your page
The process for adding an image is the same for Pages and Posts. Please review the image callout and image caption pages for adding images using the shortcodes.
- In the text editor, insert your cursor where you’d like to insert the image.
- Click Add Media.
- Select the image from the Media Library.
- Ensure all titles and alt text are included.
- Select the size of the image from the dropdown menu in the Attachment Display Settings.
- Click Insert into page.
How to make edits to images in the content editor
Once an image is added to a page or post, you can still make edits to the size and alignment. The instructions below apply only when using the visual editor.
- To change the alignment, select the image and choose the alignment option.
- To change the size, select the image and click the pencil icon. Make the necessary adjustments and click Update.