Academic unit site support
Business unit site support
Cropping images
When an image is added to the Media Library, you can choose how the image should be cropped based on size or dimensions. The Crop Featured Image tool allows you to crop the image for each option. You might want a different part of the image to be centered if it’s in portrait or landscape mode. You only need to adjust the crop for you image once, but you can change the crop for each instance.
Watch the Cropping images video
-
How to crop new images Tab Open
-
How to crop placed images Tab Closed
-
Troubleshooting images Tab Closed
How to crop new images Accordion Open
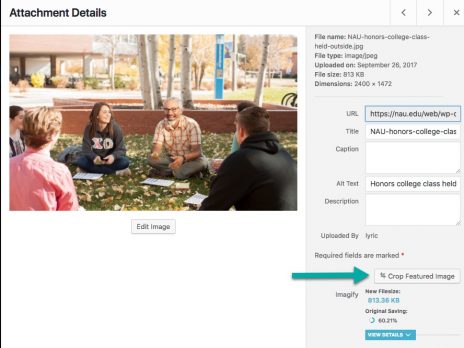
- Add media and select desired image.
- Select Crop Featured Image.

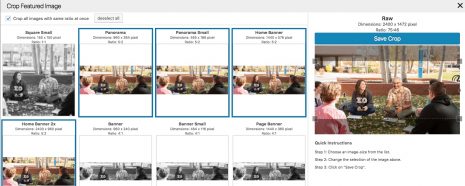
- Choose an image.
- Drag the cropping tool on the right-hand side to the desired portion of the image.

- Select Save Crop. Repeat for other image dimensions, if needed.
How to crop placed images Accordion Closed
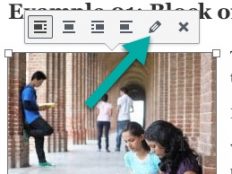
- Select desired image.
- Select the pencil icon to edit.

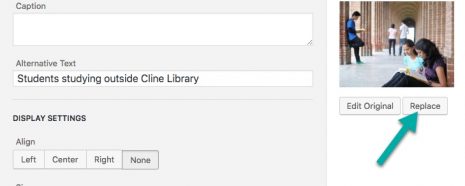
- Select Replace under the image thumbnail.

- Select Crop Featured Image.
- Choose an image.
- Drag the cropping tool on the right-hand side to the desired portion of the image.
- Select Save Crop. Repeat for other image dimensions, if needed.
Troubleshooting images Accordion Closed
If the image doesn’t immediately reflect the cropped settings, clear your browser’s cache.
For most browsers, you can clear your cache from the Settings or Options area. Most browsers have a Privacy or History section that contains the cache clearing option.
By default, the cropping tool automatically selects all images with the same dimensions, but you can individually select and deselect them. Uncheck the “Crop all images with same ratio at once” checkbox.